 Changing Faces
One of the abilities Vlad Tepes acquired
during his unholy transformation into the immortal vampire Count Dracula was
the power to change his shape--to alter his appearance to any form his dark
heart could conjure up. That is, in addition
to his noted ability to transform into mist, a bat or a wolf, Dracula could
morph into an array of unique, sinister creatures in a last-ditch attempt
to sink his Belmont rival. His transforming would only commence once he had
been depleted in battle; he'd use his remaining unbridled power to contact
his "master" (presumably Satan) and summon from the underworld the
blessing needed to unleash these far-more-terrifying forms. Successors to
his throne, the victorious Dark Lord candidates, certainly inherited this
ability and will be recognized all the same.
In the legendary Castlevania, the series'
origin, the Dark Lord fights like the typical ol' Dracula that you'll come
to know and love: He'll teleport in and out to random locations, appearing
right where you stand maybe 80% of the time. After
each teleport, he'll open his cape and release three-directional fireballs
(which would become known as "Hellfire"). You'll have to avoid
the fireballs, by either leaping over them or by whipping them away, and
in turn strike Dracula's lone weak spot--his head. After disposing of his
original skin, he'll transform into the creature below.
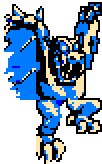
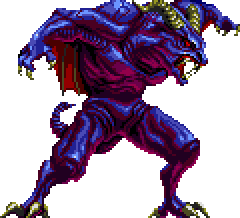
The Count morphs into a gigantic man-bat-type
creature (which resembles one of his transformations in Bram Stoker's
Dracula). However slow, its size is its most overwhelming attribute,
and its high jumps, which see it catch much air upward, supply the hero
little time to sneak directly underneath it because of said size. The most
important thing to remember is to not get cornered on either side of the
room. After every second jump, it'll
stop to spit out three-directional fireballs diagonally downward at the
grounded foe. So simply waiting for it to complete a jump before you strike
is not always the best idea--dodging its attacks while trying to strike
it is a task not to be taken lightly. Remember that striking its head does
the most damage, but holy water thrown at any part of it can be used slow
it down greatly.
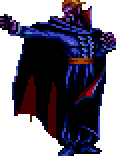
Here we find that Dracula is nothing more than a
caped skeleton. He attacks, as you'll notice, similarly to his first form
in Castlevania: He teleports in and out, to random locations, stopping
each time to release his three-directional fireballs--the origin and blueprint
for this specific attack plan. Unlike in Castlevania, you can't jump
over the fireballs--you can only duck to avoid contact. You'll have to figure
out a way to strike his head before the fireball release; then you'll have
to turn, run and duck and do so just in time. When you figure it out
and strike enough times his cranky mug, after what's sure to be a long battle,
he'll use his remaining power to possess the painting in the background.
When Dracula possesses the picture, the dot on
its forehead begins to glow; the dot is its only weak spot. You'll have
to jump upward using the platforms on either side of the room and dive off
to get a clear shot. But it's not that easy--our boy Drac spits out vampire
bats in streaming swarms, each swooping up and around, in the direction
of whatever side of the room you're on. There's only a slight rest in between
swarm-spewing; you'll have to move very quickly to reach a top platform
as the bats give chase. If you have the dagger equipped as your main weapon,
you can duck on one of the middle platforms and within precision chuck them
one after another toward the weak spot while absorbing the blows from the
bats.
Dracula attacks a bit differently
here than he does in the other, Castlevania-titled games you're likely to
have played. The Count will hover on one side of the room and then suddenly
throw in your direction two long daggers. If you don't figure out how to
dodge the daggers quickly enough to get in a shot of your own offense, he'll
turn into a swarm of bats and fly to the middle or to the opposite side
of the room. He's invulnerable to all attacks while in this bat form. He'll
keep doing this until you've damaged him enough, and thereafter he'll then
wisp away and come back in the form below.
 |
|
|
 |
Yep--he's a giant head. Though, he's
very reminiscent of his second form in Vampire Killer in that all
he seems to do is spit out swarm after swarm of vampire bats that swoop
toward the overwhelmed hero. That's about it. Of course, energy in Haunted
Castle is scarce, so this is about all he needs to do. If you can manage
to whip fast enough, or quickly utilize a sub-weapon, and strike his huge
melon enough times before the bats eventually kill you, you will have just
beaten the toughest game in the series (and perhaps any series).
| . |
Castlevania
II:
Simon's Quest
|
. |
It's in Simon's Quest where Dracula only
takes one form: A robed skeleton. Due to his less-than-indicative performance,
it's easy to pass off the challenge presented as, in others' words, "ridiculously
easy." Well, it is true--if you have laurels. Otherwise, Dracula
is more difficult to defeat than some would have you believe. Soon after
burning away his body parts, Dracula will appear and temporarily remain
in place before he begins to rotate about the room in a blaze, the sheer
omnipresence leaving Simon little room to maneuver. Drac will stop sporadically
to spew out large rotating scythes, which are capable of inflicting more
damage than any single one of the game's dangers. If you have laurels
handy, all you'll need to do is power up and whip like crazy; victory will
very quickly be yours. If you have the golden knife, also, you can stifle
his very movement and kill him off before he can even budge.
| . |
Castlevania
III:
Dracula's Curse
|
. |
The performance in Dracula's Curse shows
that our pal Dracula was a bit more morph-happy in his early years. The
Dark Lord will await your entry into his throne area, and then he'll quickly
take a vertical base from which he'll raise his staff into the air and cause
two large flame pillars to rise up in random locations; their proximity
will surely be meant to sandwich the hero between them. Somewhere in between
(read: right where you stand), a third flame will quickly sprout
up and potentially knock you back. In the meantime, Dracula will teleport
to your position--in a more predictable illusion-based shift--to interfere
in your flame-avoidance decision-making. After a few quick hits have been
scored, Drac will stop playing around.
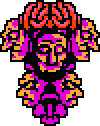
When I first witnessed the look and movement of
this form, I originally dubbed it "Queen
Medusa" (since it sort of resembles Medusa from as she appeared in
Castlevania); this multi-faced horror is actually a collection of
tortured souls, a membrane of evil within which Dracula is the middle face.
It'll hover around the room in a set pattern, dripping deadly blood droplets
while trying to force you to either side of the room, where it can induce
multiple hits. It must be attacked from both sides, high and low, to destroy
all of the faces (unless you're using Sypha's magic, which can rip through
the creature). After knocking off all of its flesh, Dracula will give it
one last-ditch effort in the form of the nightmare below.
 |
|
|
 |
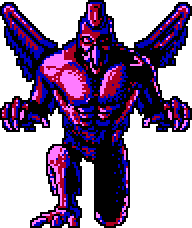
Here we have one of Dracula's largest-ever transformations.
The monstrosity's only weak spot is its head, but getting up to that point
is easier typed than done. In order to reach the required height to score
a direct hit, you'll have to ride on the platforms that conveniently break
apart from the throne-room floor and begin circling the immediate area.
Dracula, though, is not going to kneel back and take it: At any time,
be it when you're riding on the platforms, Dracula will accurately blast
from its forehead or hands long electric beams whose damage afflicted is
devesating. All of your problems will be alleviated if you happen to have
handy an axe, which you can from the lowest level jump and toss and certainly
score a hit.
| . |
Castlevania:
The Adventure
|
. |
Here Dracula employs a very predictable strategy:
He continues to teleport around the room to any of four locations--four
platforms aligned in a diamond shape--and during each stop fires away; the
six-round attack alternates between two four-directional projectile-tossing
schemes--one at 45 degrees ("X") and the other at 90 ("+").
Your offense, in turn, is all about positioning yourself on the correct
platforms and in some cases hoping for the best; primarily, you'll want
to avoid being knocked into the two spike pits placed on either side of
the room. If you manage to overcome the odds, Dracula will conjure up another
ridiculous challenge.
Dracula chooses a more recognizable form--a giant
vampire bat that flies back and forth atop the screen. The bat will halt
after every third trek across the screen and release from its care a trio
of smaller bats, a group that will flutter about and greatly distract the
hero as they fly in from unwhippable angles. Only by quickly jumping back
and forth, from one side of the room to the other, will you find an opening.
To defeat the giant vampire bat requires many direct hits, and you'll probably
be low on energy and whip power. What should you do? Well, try to always
stay in motion, which will increase your odds for victory. Yeah, right.
Dracula's two forms aren't really all that different.
He'll start out, as usual, with his basic teleporting scheme; after each
stop, he'll release a single fireball that breaks into three either upon
whip impact or by the proximity of Simon attempting to jump over it. When
about 60% of his energy meter has been cleared, he'll three times in a row
after teleports release tiny little projectiles that speed about the room
in random patterns; if struck, the projectile will break open and disseminate,
resulting in a spreadshot. Though, for Drac, there's an unwanted side effect:
At spreadshot's end, a nourishing chicken leg is revealed. When his energy
is really depleted, Dracula will use the old trick of commanding
two flame pillars to rise up random locations; the fiery tips of each pillar
will spawn two flaming entities, which like vultures will chase you around
the room and distract from the real target. A few more shots and ol' Drac
will get serious.
Dracula, looking more like you'll remember him
from Simon's Quest and Vampire Killer, will continue right
where he left off, with none in the way of his own energy replenishment.
He'll continue to teleport about, yes, but he'll begin to showcase one of
his most deadly tricks: He'll command that four bolts of lightning, placed
vertically parallel, strike down from the throne room's ceiling. Little
space will be left in between the individual lightning bolts, and mere contact
with a blast will surely be devastating to your health. A quick comeback
by the Dark Lord is very likely. Though, if your concentration and placement
are sound, you should be able to calmly dodge the blasts and continue to
score direct hits to the Count's bony dome.
| . |
Castlevania
II:
Belmont's Revenge
|
. |
It's unusual that we find a title where Dracula
has only one form, but Belmont's Revenge is it. But make no mistake
about it: It's a considerable form, a force with which to be reckoned.
As he does in his typical "Game Boy"-style offensive scheme, he
prefers to broaden his teleportation ritual and appear everywhere--up,
down, left, right, and on all platforms in between. Dracula attacks by firing
a spreadshot-type orb onslaught that starts small but quickly rotates progressively
outward; this very scheme requires that, for each of his possible teleport
locations, you hurry to a safe spot in which an orb does not pass, otherwise
avoiding direct contact with the count. Once you learn the orb patterns,
you can prepare a gameplan wherein you score the necessary headshots before
quickly retreating to your noted safety area.
After finishing a sip from his blood-filled champagne
glass, Dracula will teleport in, ready for battle. He'll put to use the
usual three-directional fireball attack, but it's not done in a conventional
way; instead, the fireballs' flight pattern is dependent on Simon's location
at the time of Dracula's cape-opening. If you're in mid-jump, that is, Drac
will elevate upward their trajectory. The trick is to stand at a distance
and jump to force Dracula to fire them where you soon won't be. Otherwise,
you can take the fight to him: You can time a leap and a combined
whip stroke so that you strike his head on the leap's descent and thereafter
cancel out in one shot the just-released fireballs. After he's been repeatedly
damage, Dracula will up the fireball attack to five-directional, but your
strategy shouldn't change. In the Chronicles
remake (in the "Arranged Mode"), Dracula's sprite design differs,
but this does not affect the actual battle entailed.
 |
|
|
 |
His second form is the same no matter which version
you're playing, and it's very similar to the second form faced in Castlevania.
The winged demon jumps very high and with repeated lunges uses its bulk
to chase you to either side of the room. With no set intervals, it will
after some jumps spit out a number of rebounding fireballs to force a response;
if you get too close to the demon, thereafter, it'll send a vicious claw
swipe your way. After it's absorbed some damage, it will during its jumps
begin dripping from its frame deadly acid, which upon hitting the floor
will spread in either direction; this makes it more difficult to work your
way beneath the demon during its high jumps. Bring it to its last
few energy bars and it'll become desperate: It will now begin spitting out
rebounding fireballs in rapid-fire fashion, and you'll somehow have to remain
poised in your response if you want to survive what could be a one-shot
kill. You've come too far to fall after another of those famed Dracula comebacks.
Not that it's to him a priority, but Dracula's
first form is rather weak (neither his second or third forms strays far
from this early challenge). The real test, thanks to the nature of Bloodlines
and its multiple-boss onslaughts, is making it to this point with enough
energy to spare--five boss battles beforehand have surely worn on you. He
has three separate means of offense: (1) He attacks, as always, with the
classic three-directional fireball. (2) He'll command forth two heat-seeking
flame blasts. And (3) he'll release in a fixed direction a strange spinning
lightning bolt. After about five or six hits are scored, he'll try something
different.
Dracula's new form isn't all that different from
those taken by his best pal, the Grim Reaper. To start the second battle,
it'll show you its wares by quickly darting to and fro about the room, dodging
your whip strokes with relative ease; it's clear, too, that it wants to
goad you into making foolish movements and therein strike for repeated contact
and a quick kill. It'll first attack by unleashing two medium-sized fireballs
that will quickly circle the room in opposite directions. While you prepare
to avoid the fireballs, Drac will atop the room fly to mid-screen, split
into four equal parts, and from each position fire down parallel bolts of
lightning (as he did in Super Castlevania IV). During this time,
only the real Dracula can be struck. And when that's been done enough
times, it'll force the Count to bring out the next incarnation.
 |
|
|
 |
This is for Bloodlines a very large adversary,
so trying to avoid direct contact will at all times be your top priority.
It will initially attack by tossing onto the ground a set of four exploding
scythes that cause flames to rise up from their point of impact; there are
clear safe spots in between that can be effectively utilized. When it's
been damaged, it will change color and begin firing long arcing flame blasts
(similar to those fired by Hot Dogs in Mega Man 2). When low on fuel,
it will once again change color and really begin putting its size to use;
that is, it will constantly jump from left to right and vice versa and attempt
to overwhelm. After each successful whip-strike, it will release all around
a scattering array of dislodged bones; this must be considered as you attempt
to move beneath the demon. Since it's now low on energy, it'll only take
a bit more offensive punch to put this baby away.
| . |
Dracula
X: Rondo of Blood
|
. |
Though Dracula's look is cosmetically different
from the one seen in Castlevania: Dracula X, he's the very same fighter.
You know the drill: Dracula will teleport all about the castle keep throne
room and in between release his three-directional fireballs. Though, he's
added to the mix a new projectile attack: After every fourth teleport, he'll
unleash two large pulsating orbs--the first high, the second low--that rev
up and blast in your direction. You shouldn't have too much trouble telegraphing
either attack and forcing the Dracula to adopt a more interesting form.
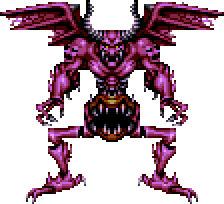
Though more fearsome-looking, his second form
is hardly the threat it appears to be. If anything, it spends most of its
time aimlessly jumping about. But don't be fooled--if not in timely fashion
dealt with, it can corner you on either side of the room and score
some crushing blows. After every third jump, he'll spit in out three huge
balls of flame in three directions albeit not in your general direction.
After a number of jumps thereafter, it'll gather itself into a corner and
unleash across the way a wide scrolling blast that can only be crouched
beneath (if you don't want your energy to go bye-bye). The only true
danger is direct contact when you try to run beneath the demon, but, even
then, you should be more than equipped to quickly finish this thing off,
especially if you have a boomerang in hand.
Dracula is the same Dark Lord you've come to know
and love, but this battle is a bit different: You'll be holding court
on the very tip-tops of pillars--some high, others lower--sandwiched between
each considerable gaps. Dracula will surely take advantage of this obvious
danger. At your arrival, he'll begin teleporting about from pillar to pillar,
stopping to release three-directional fireballs. Though, like his Rondo
skin, he'll mix things up and at other times unleash two large pulsating
orbs--the first high, the second low--that rev up and blast in your direction.
If you can find a good comfort zone, preferably on the low pillars, you
can from there memorize his tendencies and strike when ready. But be careful--one
wrong move and it's all over.
It looks like a different animal, but this second
form very much mimics Dracula's second form from Rondo. It will showcase
its high-jumping ability by lunging toward the hero, from pillar to pillar.
There's not much you can do prevent being cornered, considering the lack
of--oh, I don't know--a floor, so you should avoid finishing off
Drac's first form if it's positioned on a center pillar. After each pillar-hop,
the demon will spit in your direction two huge balls of flame; after every
third jump, it'll unleash across the way a wide devastating scroll-blast,
which you can dodge easily by crouching on a low pillar. If you have long-range
sub-weapons, use them; if not, you'll have no choice but to take the fight
to the highest pillars, retreating when necessary.
Page 2: More
Dracula Forms | Back

![]() Changing Faces
Changing Faces ![]()

