
![]()
| . | |||
|
|
 |
|
Tips:
64 |
| . |
|
Quick
Tips
|
Dracula X: Rondo of Blood has a built-in save feature, so no passwords or codes are required. However, in any given mission, you can attain 100% completion by finding all of the alternate stages and by rescuing all of the kidnapped women. Below are the respective methods used to locate hidden exits and find the women.
Hidden Exits
Stage 1: Town Ruins
 |
 |
 |
 |
Make your way to the bottom-right corner of Aljiba (the Simon's Quest-lookin' town) and whip the lower part of the left wall to create a step. From there, jump up to the screen's far side and whip the wall's middle portion, which will crumble away upon being struck. Once you're inside the house, travel over to the left and drop into the gap; it leads down into the town's underground reservoir, which appears to have no exit. However, you can advance by clearing away the right wall and walking straight ahead (you can clear away the left wall, too, but there's nothing there except for a stone rose, which holds no treasure and is there merely to distract and misdirect you). After exiting into the well, ride the pulley-bolted buckets to its top and head through the door. There you'll find the lake bridge and alternate boss--the water dragon.
Stage 2: Main Hall
 |
 |
 |
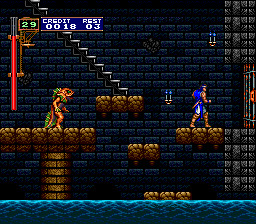
Shortly after you arrive in the main halls' second room, the behemoth will crash through the left wall and start to give chase. While fleeing to the right, drop down into any of the next three gaps you come across (advisably the third). All three lead down into the halls' watery underground (a section that is separate from the usual watery-underground area we access while traversing these halls), which expectedly is populated with scores of fishmen. To proceed to the alternate boss, all you have to do is continue heading right. The trek entails some tricky platforming rendered as much by the fishmen who dive out from the water often and seemingly at random; that's why it's recommended that you skip most of it by dropping down into the third gap.
Stage 2': Lake Bridge
 |
 |
 |
|
It should be noted that you're not entitled to continue along the alternate route simply because you've located a single leg of it; rather, if you hope to remain on this route, you're going to have to continue finding the game's alternate bosses. That's what you'll want to do on the Lake Bridge--the game's first alternate stage. When you descend to the bridge's lower level and look around the right, you'll notice that there's a seemingly-traversable platform standing near the screen's edge; though, it's too far away for Richter to reach. Instead, you have to rely on another method: Head up the nearby stairway--to the second half of the bridge's upper level--and locate the remains of the deceased dragon whose spinal column is the only thing connecting two of the bridge's pillars. Any vertebrae stepped upon will collapse and potentially deposit you into the watery abyss below. However, you're going to need to collapse them and do so in a certain way; you'll want to collapse them to where the remaining parts are arranged as seen in the second image to the left (though, you'll be in a better position if you can somehow leave three vertebrae). Now use the rightmost vertebrae as a launching point and take a leap of faith to the right; you'll fall to the screen below and land on the previously discussed platform. From there, continue heading right. A lone Armor Lord is all that stands between you and the alternate boss. Alternatively, if you have the high-flying Maria at your disposal, you can simply double-jump your way over the watery gap and not have to deal with the spinal bridge.
Stage 3: The Chapel
 |
 |
 |
 |
During your trek through the chapel, you'll arrive at a room that features giant candles whose wax frames act as foreground objects. What you'll want to do is make it to the end of this room without falling into any of its gaps (doing which will deposit you into the chapel's basement and rob of you of the chance to access the alternate boss) and do so while in possession of an axe (conveniently there's one of these in one of the room's first candelabras), a holy book or a cross. This will be made difficult by the ghosts and spear guards that clog up the surrounding space but especially by the slippery giant fleaman who will steal your sub-weapon if you make contact with him; striking him down or attempting to knock him into a gap will prove tricky, so you'd be better served to take him out with an item-crash--preferably the moment he appears onscreen. You'll need to hold onto one of the aforementioned sub-weapons because waiting at the end of this room is a scale-like lift whose use requires their destructive power. The lift is intended to carry you upward, but it can't do as much in its current state because it lacks a built-in overbalancing object. Its just your luck, then, that a large rock is hanging from the ceiling above the right car. While positioned in the left car, throw an axe or a holy book at (or use an item-crash for either of they or a cross in the vicinity of) the rock to dislodge it, doing which will cause it to fall onto the right car and subsequently elevate you to the room above. Once there, exit through the door to find the alternate boss. Alternatively, you can remove all of the stress and simply use Maria's high-jumping ability and natural bird attack to dislodge the rock.
Stage 3': The Graveyard
 |
 |
 |
|
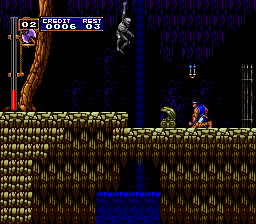
At the graveyard's midpoint, you'll be tasked with jumping from one platform to the next while trying to avoid contact with the spiked balls that are attached to undulating chains. Though, you can completely negate these obstructions by striking their chains at about their center points. What you may not realize is that there's an added benefit to employing this tactic: When the chains are broken, the spiked balls drop into the gaps and fall through the area directly below--the one you traveled to get here; the second such spiked ball completely destroys what turns out to be a brittle set of blocks (the one next to which Richter is kneeling in the leftmost screenshot) and clears the way to a secret underground area. After disengaging the spiked ball, head back down to the area below and drop into the newly carved gap. You'll fall into a one-room cavern whose door leads to the alternate boss. On the way down, you'll necessarily make contact with the spiked ball (unless you're Maria and double-jump either left or right immediately upon entry), which now resides on the cavern's center platform, but don't worry about it--it's all for show, and you don't actually take any damage.
Stage 4: The Dungeon
 |
 |
 |
No matter which path you take through the dungeon, you'll inevitably enter into a room that houses a strange rotary device whose rebounding limbs are topped with a platform and spiked ball, respectively. To the right of it is a wall that houses a secret: If you strike its lower portion, the surrounding bricks will fall away and reveal a bomb. If thereafter you strike the bomb, its wick will light and soon after cause the bomb to explode, the resulting blast serving to clear away the entire wall! This allows you to access the alternate boss whose domain lies near the far end of the newly revealed section. Though, you'll meet some resistance in the form of troublesome combinations of axe knights and rotating spike chains.
Stage 4': Mountain Range
 |
 |
 |
 |
|
The Mountain Range's is the game's most swiftly located and easily accessed alternate route. You come across it not more than a few screens into the stage and immediately upon entering its second section. There you see the upper portion of a waterfall and an endless stream of logs being carried across its surface and down its overhang. This isn't simply for show, no; in actuality, you jump onto any of these rafts and ride it down the entire waterfall! The trip lasts for about a minute, a span of time during which you'll have to deal with spear-wielding skeletons who also happen to be waterfall-surfing. It's important to stay alert, because you're required to jump to safety when you reach the section's end, lest you'll plunge into the abyss. Your signal for such is the sudden appearance of a hawk that's carrying a sign in its claws; you'll have to execute a timely leap to reach safety, and you'll have to do as much while making sure not to come in contact with sign in the moments before it becomes solidly embedded in the ground after being dropped by the hawk. After landing safely, head to the right--into the lake cavern. There you'll meet up with the Ferryman; when you enter onto his boat, he'll say, "I'll take you to a good place!" and row you over to traversable terrain. On this last stretch, you'll have to get a hold of a key (it's in a candelabra placed above a moving platform) while dealing with endlessly-spawning wavy bat swarms; if you're able to reach the area's endpoint with the key in hand, you can open the door to the boss' domain.
Kidnapped Women
Rescuing Maria
 |
 |
 |
Maria can be found on the second stage of the normal route towards Castlevania. In order to rescue her, you'll first have to find a key. When you reach the second part of the hall, the Behemoth will break through the wall and give chase, urging you to hurry. If you move fast enough, you'll find the key in the third candle you pass. Don't whip any other candles during this time, lest you'll risk uncovering a sub-weapon that'll cause you lose the key, and you won't have time to stop to retrieve it. When you enter the next room, you'll be forced downward to where the fishmen always lurk. At the end of the corridor, you'll find a locked door, which this key will definitely open. Inside, Shaft will be found holding Maria within a spell, ready to banish her. When you get close enough, he'll sense your proximity and disappear. You'll thus save Maria and open up the ability to play as the fiery youth from the title screen.
Rescuing Tera
 |
 |
 |
Tera is being held on Stage 3', on the alternate route. After defeating the Three-Eyed Skull, you'll enter into the area you see to the left. Below the door is a wall made up of four bricks. If you walk up to the wall and whip it regularly, nothing will happen. But if you whip the top brick first, you can crack the rest, progressively downward, which will allow you to enter the next part of the stage from a different entry point. When you enter into the next room, there'll be a stairway leading downward to where you'll find Tera praying. After rescuing her, just proceed back up the stairway, whip the bricks away, and climb up on the skeletal limb of the long-dead dinosaur.
Rescuing Iris
 |
 |
 |
 |
Iris can be found on the alternate Stage 4. After you traverse an initial portion of the stage, wherein you will have dealt with frogs and ravens, you'll enter the bridge-filled woodland where you'll immediately see a little stone frog statue (as seen next to Richter in the picture on the left). Whip the frog statue and it'll descend into the ground. Continue along until the end of this particular area and whip the other stone statue (again, seen left). Now, trek back to where all of the bridges used to connect; one will have collapsed, opening up the way to a stairway that leads to a fishmen-inhabited cave. At the end of the cave is a gate blocking a chamber, from where Iris is being held in a small cabin.
Rescuing Annet
 |
 |
 |
 |
Since Annet was the most important person to Richter, Dracula has imprisoned her within the clock tower, Stage 7, which is located near the castle keep. After traveling over a long bat-infested bridge, you'll enter the first leg of the clock tower. Atop the first leg is a door that can be opened by striking the gear above it with your whip about seven times (as seen in Symphony of the Night). The door leads outside to an eagle's perch, where its tenant guards the key chained around its neck. After defeating the bird, it'll drop the key. Simply take the key to the next leg of the clock tower and use it to open the locked door at its bottom. You'll find the relieved Annet waiting inside.
Other Tips
The Turn Jump: Easy to miss is Richter's "Turn Jump" ability, which affords him more aerial control where basic jumps require a commitment. Simply hold down the jump button following a jump and press left or right on the digital pad to execute a Turn Jump, using which an airborne Richter can now redirect and land in a desired position. (Contributed by Akumajou Otaku.)
 |
 |
 |
Flame Whip Attack: Thus far, Richter seems to be the only Belmont who relies on a single whip type: the Morning Star version of the Vampire Killer. However, he can augment it in a special way; specifically, he can afford it flame power and execute a flame-whip attack. The conditions are such: Refrain from collecting a sub-weapon, collect 15 or more hearts, and then press the item-crash button when you wish to execute the attack; in doing so, Richter will unleash a powerful long-range fire chain.

Scenery Manipulation: On Stage 3, the Chapel, you'll come to a safe area after enduring a series of rotating platforms patrolled by Medusa Heads. Right before facing the lone Paranthropus that follows, you'll see three warrior-inspired statues placed atop stone skulls. If you can somehow strike each one so that all three are left facing the same direction, a secret money bag will be yours. The best way to do this is to reach this area while in possession of an axe; though, Maria can reach the distance using her double jump and any weapon. Another example is striking the earlier crucifix to unveil a stopwatch.


There are many others like it. On any given stage, that is, you may be able to manipulate backgrounds or strike anything visible (like killing the innocent rat that feeds in the room prior to the Dogether boss battle and for it earning yourself a money bag, a cross or a heart), so try studying the surrounding decor and strike anything you can.
 |
|
Before destroying
the skeledragon, hit any switch. Then kill the dragon to
earn a prize: white money bags for the first switch, purple for the second, and red for the third |
Money Solution: You'll notice on the mission-select screen that there's a technique option similar to the one in Symphony of the Night. To purchase a video of how to fight and easily defeat a boss, you have to pay the right amount of credits (the total of which you can view in your inventory box when the game is paused). To invest in such a technique, you'll have to collect money bags, the game's currency; every 100 points earned from collecting money bags is equal to 1 credit (the Wyvern technique, for example, requires 50 credits, which is equal to 50,000 points). Below are the values, as noted by Akumajou Otaku:


