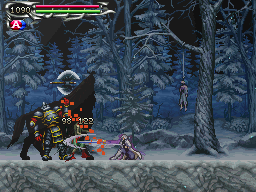
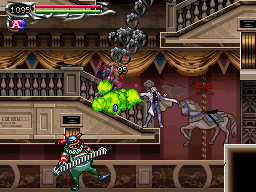
Castlevania: Dawn of Sorrow, the direct storyline follow-up to Aria of Sorrow, is our series' sixth RPG-adventure. Therein, the castle is yours to freely roam, and you'll do this through twelve separate areas--with the final area, the Abyss, covered on a map separate from the main. Listed below is the best possible order of castle navigation, taking into account storyline advancement.

Lost Village


Soma's adventure begins in the snowy mountain regions of an undisclosed European country. The path leads him to the castle entrance, near its raised and barred drawbridge, where he meets with Yoko and Julius, who because of his own agenda ditches Belnades and makes an improbable entry. Soma, while under attack of minor enemies, must escort Yoko back to the safety of a village, but not before with her encouragement battling the game's first boss creature and sealing it away; upon its defeat, Soma will earn the jump-enhancing Flying Armor soul and gain a for-the-moment replacement to an actual accessibility move. Past its habitat, the way cleared, Yoko will set up in the village area a magic shop, which is conveniently located across from Hammer's armament shop. Soma can return here at any time to stock up on new supplies. Using a path through the cabins nearby, Soma will then sneak his way into the castle.


Music Track(s)

Stage Track: Pitch Black Intrusion
"Julius Mode" Track: Beginning
Boss Track: Evil Invitation

Boss(es)

Area Boss: Flying Armor

Lesser Enemies

Zombie | Bat | Skeleton | Ouija Table | Peeping Eye | Axe Armor | Warg | Spin Devil | Armor Knight | Student Witch | Skeleton Ape | Boomerang Skeleton | Hell Boar | Great Axe Armor | White Dragon | Yeti

Wizardry Lab


The Wizardry Lab--lined with cold concrete walls, its tall bookcases, and shelves filled with flasks and beakers--is the perfect place to practice black magic. Where better for Soma to have his first meeting with the three most prominent members of the cult? After a short verbal encounter, where the cult reveals its questionable intentions, Soma will hurry on and soon face the area's imposing boss creature, who upon defeat will relinquish the Balore soul, which will allow you to clear away obstructive ice blocks using the stylus on the touch-sensitive bottom screen. In the lab's final hall, its longest measured horizontally, Soma will have to ride forward a quick-moving platform while--before or during--clearing away the ice blocks that obstruct its direct path; the armor lords, if not vanquished beforehand, will stab upward their spears and multiply your frustration; for now, only by riding this platform can Soma reach the height needed to clear a pillar that blocks the way to the next area.


Music Track(s)

Stage Track: Dracula's Tears
Boss Lead-In: Black Shudder
Boss Track: Evil Invitation

Boss(es)

Area Boss: Balore

Lesser Enemies

Ghost, Skeleton | Skull Archer | Student Witch | Slaughterer | Bomber Armor | Golem | Slime | Manticore | The Creature | Cave Troll | Larva | Heart Eater | Merman | Killer Fish | Mimic | Homunculus | Great Axe Armor | Iron Golem

Garden of Madness


The path out of the Wizardry Lab leads to the castle's garden, where its oddly grown assortment of plush plants and trees line the castle's exterior. The platforms climbed, largely, are damaged stone structures and defaced sculptures, and the some enemies in particular--the suddenly sprouting unes, the surprisingly evolving corpseweed, and the ear-shattering mandragoras--are appropriate garden tenants and its most frequent inhabitants. For now, Soma will simply work his way through the maintenance-free garden and gain easy access into the following area--the Dark Chapel. Though, Soma will soon return to the garden and in an unassuming chamber have his first battle with the fiery Dario. He'll return once again near the adventure's tail end and after opening a sealed door witness a crucial storyline sequence.


Music Track(s)

Stage Track: Platinum Moonlight
Boss Lead-In: Black Shudder
Boss Track: Scarlet Battle Soul

Boss(es)

Area Boss: Dario

Lesser Enemies

Une | Skeleton Ape | Mollusca | Rycuda | Mandragora | Yorick | Skeleton Farmer | Catoblepas | Ghoul | Treant | Corpseweed | Boomerang Skeleton | Wakwak Tree | Fleaman | Barbariccia | Mimic

Dark Chapel


This is the castle's typical chapel area, its cathedral-sized rooms decorated with its stylish tapestries, spectacular arches, impressive stain glass windows, and its oversized church bells. Its through the long vertical chapel wings where Soma's platforming ability will be center stage. They'll hopefully lead him up and around to a chamber where had will be a violent confrontation with Dmitrii Blinov, the first of the cult's Dark Lord candidates. When it appears that the ill-intentioned gent is out of the way, Soma will travel a short distance and face another boss, which will leave behind its soul for Soma to utilize as a double jump. Otherwise, you can brave your way into the chapel's neglected basement area, a veritable dungeon lined with skulls, decayed hanging victims and some rough-skinned baddies who guard some useful inventory.


Music Track(s)

Stage Track: After Confession
"Julius Mode" Track: Bloody Tears
Boss Lead-In: Black Shudder
Dmitrii Battle: Scarlet Battle Soul
Malphas Battle: Evil Invitation

Boss(es)

Area Bosses: (1) Dmitrii, (2) Malphas

Lesser Enemies

Catoblepase | Tombstone | Ghost Dancer | Mini Devil | Quetzalcoatl | Amalaric Sniper | Valkyrie | Ghoul | The Creature | Great Armor | Witch, Guillotiner | Hell Boar | Bone Pillar | White Dragon | Barbariccia

Demon Guest House


After retreating to the garden and defeating Dario, the second Dark Lord candidate, Soma will head to its upper-left regions via his new double jump and exit into the guest house, an extravagantly decorated den featuring finely crafted chandliers--both conventional and oversized--priceless paintings, a giant organ, and polished furniture to match. Its on the giant chandeliers--those adorning the interior of three large like-themed compartments--where most of the area's platforming is handled. Most conspicuous is a room featuring a flint-old-type puzzle, a four-by-four grid where you must adjoin numbered blocks (1-16) to magically create a path through the following set of rooms, which in matching are set up four-by-four. If you hope to create a valid path, you must set them up so that the block's branching connectors line up. It's not necessary to visit every room (which in reality hold some pretty useful inventory items), so your job is to lead Soma to room 1, whose block must be set into the grid's upper-left corner if you want to escape the ensuing roomset. In following, he'll face a boss whose defeat will earn Soma the Puppet Master soul, an unusual accessibility move. Soma will return here later to battle the second boss and earn the Paranoia soul power, which is important to finishing the game for the best ending.


Music Track(s)

Stage Track: Demon Guest House
Paranoia Decoy Battle: Evil Invitation
Boss Battle: Into the Dark Night

Boss(es)

Area Bosses: (1) Puppet Master, (2) Paranoia Decoy, (3) Paranoia

Lesser Enemies

Skeleton | Peeping Eye | Axe Armor | Ghost Dancer | Student Witch | Killer Doll | Waiter Skeleton | Persephone | Quetzalcoatl | Witch | Buer | Lilith | Valkyrie | Killer Clown | Boomerang Skeleton | Devil | Malachi | Mimic | Succubus | Flame Demon | Iron Golem

Subterranean Hell


Your next likely destination is the Subterranean Hell, which you can reach by returning to the chapel and using the Puppet Master soul to pass a before-impenetrable wall. In reality, this is typical series' cave area highlighted by ominous caverns, murky pools of water populated by the ever-present fishmen and other dangerous sea life, and plenty of water-based platforming therein. First, though, he needs the means for exploration--that is, soon after entry, he'll face the water-based boss, who upon defeat lends Soma the Rahab soul, which allows him to navigate underwater with repeated jumps and to thus freely roam the area. The area features, also, a rather long extension, a series of flooded rooms that serve no importance to the actual mission. By using the Puppet Master bullet soul combined with the Ape Skeleton enchanted soul, you can work past a spike-filled cavern and into the lower-left portion of the castle, which was until then mapped out but highly inaccessible; it's worth the visit for the goodies entailed.


Music Track(s)

Stage Track: Subterranean Hell
Boss Track: Evil Invitation

Boss(es)

Area Boss: Rahab

Lesser Enemies

Une | Needles | Cave Troll | Medusa Head | Merman | Devil | Fish Head | Ukoback | Killer Fish | Mimic | Dead Pirate | Frozen Shade | Decarabia | Procel | Bone Ark | Alura Une

Condemned Tower


For the time being, you'll want to head back to the chapel and specifically to its bell tower, at the top of which you can use the Puppet Master soul to reach a new area--a condemned tower. The tower is just that--a far-reaching vertical monstrosity that must be climbed. Rather than its skeletal framework, Soma will use the drab tower's exterior branches and balconies and slowly reach the very top. While the tower is scarcely populated, the trek is hardly clear-sailing thanks to the likes of disc armor and other pesky foes like the werewolf and flea men. The reward for a successful climb is a battle against one the game's most feared bosses, whose tantrums will eventually cause the chamber's floor (and several below) to give, thereby taking the battle to the tower's lowest level. Soma will have to reclimb the tower and use his Flying Armor soul to hop the now-platformless tower innards. Past the chamber that once housed Gergoth is a key that will open a nearby locked door, which leads to the next area. Later on, Soma will return and in a lower-level room attempt to breach a barrier that Julius Belmont has since failed to remove.


Music Track(s)

Stage Track: Condemned Tower
Boss Track: Into the Dark Night

Boss(es)

Area Boss: Gergoth

Lesser Enemies

Skeleton Ape | Flea Man | Draghignazzo | Buer | Disc Armor | Great Axe Armor | Werewolf

Cursed Clock Tower


Past the locked door, Soma will arrive at the perennial series' clock tower, where during a cut-scene he'll chat with Celia Fortner. This clock tower, not in particular, is defined by its moving platforms; its huge spinning gears, which are seen and traveled upon from the front and on their sides; a roomed filled with pistons whose only purpose is to lift you into a spike-lined ceiling; rooms with series of spike-adorned pin-wheel-like spinners; and, of course, giant pendulums that help Soma to reach new heights and assist in his traveling over spike-lined floorways. Expected foes, like Medusa heads and harpies, will make hell the frantic platforming in a tower where spike traps are an increasingly frequent danger. At the very top of the tower, Soma will face its lone boss, whose defeat will earn him a time-stopping soul power, which will help Soma to backtrack and breach the next area.


Music Track(s)

Stage Track: Cursed Clock Tower
Boss Track: Into the Dark Night

Boss(es)

Area Boss: Zephyr

Lesser Enemies

Catoblepas | Devil | Imp | Harpy | Malachi | Medusa Head | Dead Pirate | Bugbear | Slime | Tanjelly | Flying Humanoid

Silenced Ruins


Upon entering the ruins, time will stop, which will render the surroundings frozen and un-manipulatable. Using the Zephyr soul, Soma can reverse this effect and gain entry into the following halls. The ruins are best described as Dawn of Sorrow's "main halls," with the nostalgic scenery indicative of Castlevania's first stage and its ilk: You have the well-worn walls and stairways, which have started to crumble and erode, revealing in some places a moltenous backdrop; the large pillars and windows adorned by tattered curtains; some large sculptures; and, at least initially, the typical enemy assortment. At the halls' tail end, after more storyline advancement with Julius and Dario, Soma will face an appropriately assigned boss. Its defeat will supply Soma the Bat Company soul, which will allow him to transform into a bat and showcase the definitive means of accessibility. With this ability, he'd be apt to travel back to the Clock Tower and to a room where it would be best utilized--one in particular where spikes line the sides of a very narrow passage and thus block the way to the following area.


Music Track(s)

Stage Track: Vampire Killer
Boss Track: Evil Invitation

Boss(es)

Area Boss: Bat Company

Lesser Enemies

Bat | Skeleton | Peeping Eye | Skull Archer | Ghoul | Waiter Skeleton | Boomerang Skeleton | Devil | Larva | Dead Mate | Gorgon | Dead Crusader

The Pinnacle


The Pinnacle, to where Soma was challenged to reach, represents the castle's highest point. Its early halls are hardly distinguishable, and they present, danger-wise, only standard fare. Though, further travels will bring you to the Pinnacle's snowy exterior, where Soma's high-jumping and maneuverability will be tested by the towering bridge-like structures, their damaged foundations, and the deadly enemies packed in between. Soma will work his way inside and out in order to climb his way up to the Pinnacle's keep and embedded throne room. Here he'll again encounter Dario, whose defeat will earn the worst ending. Rather, Soma will have to beforehand retreat to the Guest House and (if he hasn't already) earn the Paranoia soul, which will help him to discover the real boss of concern. After the defeat of said boss, Aguni, a storyline sequence will play and Soma will be urged to head back to the Garden of Madness and then to the Condemned Tower's "barrier" room. When the heroes remove the barrier, they'll gain entry into the following area.


Music Track(s)

Stage Track: The Pinnacle
Dario Battle: Scarlet Battle Soul
Aguni Battle: Portal to Dark Bravery

Boss(es)

Area Boss: Dario
Alternate Boss: Aguni

Lesser Enemies

Guillotiner | Malachi | Bugbear | Mushussu | Dead Crusader | Dead Warrior | Erinys | Succubus | Werewolf | Flame Demon | Final Guard | Alastor | Moth Man

Mine of Judgement


Following Genya Arikado's lead, Soma will enter the Mine of Judgement. As its name suggests, this is a dark and dank abandoned mine, a mix of cold stone chambers and forgotten chasms where the main visual is the terrifying skeletal structures of demons who have since become fossilized. Soma's objective is to work his way repeatedly downward, through a depressive sinkhole lit only by a few remaining lanterns. Most troubling are the poisonous (read: annoying) enemies that slink about the mine's rough and curvy surfaces, wherein they crowd the area and magnify greatly the assaults of their follow baddies--most prominently the famed Slogra and Gaibon, who have given up on boss life. At the very bottom of the long mine, Soma will face one of the ultimate evils of the "Castlevania" world and after its defeat gain access to a portal that will transport him the to an unmarked location, the last vestige of Celia's cult.


Music Track(s)

Stage Track: Underground Melodies
Boss Track: Portal to Dark Bravery

Boss(es)

Area Boss: Death

Lesser Enemies

Bugbear | Ripper | Giant Slug | Tanjelly | Slogra | Gaibon

The Abyss


Soma will find himself in the Abyss, a chaotic netherworld whose forward path is as erratic as its ever-changing scenery (be it "fire," "ice," "deep space," or just "weird"). Said dangers include pillars of flame that rise about suddenly, pools of sand within which Soma will sink rapidly while enemies take advantage, more in the way of devilish spike traps, and groups of effectively paired foes. Considering even save rooms, Soma will have to dredge on through dangerous environments filled with some of the game's toughest minor enemies; during the onslaughts, energy conservation will always be an issue, even at high levels. Halfway through, Soma will face and defeat perhaps the most persistently aggravating boss the series has ever known, and he'll then have to press on through more of the same. Eventually, he'll locate a final portal, which will whisk him away to the Abyss' source, where the final battle will commence after yet another storyline sequence.


Music Track(s)

Stage Track: The Abyss
Abaddon Battle: Portal to Dark Bravery
Menace Battle: Piercing Battle Fury
Soma Battle: Illusionary Song

Boss(es)

Area Bosses: (1) Abaddon, (2) Menace
"Julius Mode" Bosses: (1) Soma Cruz, (2) Dracula's Ghost

Lesser Enemies

White Dragon | Malachi | Heart Eater | Frozen Shade | Erinys | Devil | Succubus | Ripper | Black Panther | Mud Demon | Giant Slug | Flame Demon | Arc Demon | Stolas | Final Guard | Tanjelly | Malacoda | Alastor | Iron Golem

Back to Stage Listing | Back to Game Page