
![]()
For tips and codes from the PlayStation version, click here
| . | |||
|
|
 |
|
Tips:
15 |
| . |
|
Quick
Tips
|
Guide To Maria
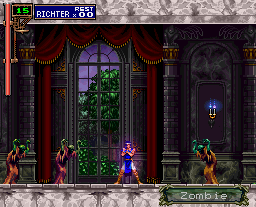
Exclusive to Nocturne In the Moonlight is the ability to play as Maria Renard. There are no secret conditions to playing as Maria since she's available to us from game's start. Since they don't give us any deep explanation how to use the young Renard, neither in the manual nor in the game, I will do so here.
Maria is most similar to Richter in mechanics: She moves at about the same speed--while walking or running--jumps about the same height, and will explore the castle in much the same fashion. For instance: Collecting life-ups will simply replenish her energy while heart-ups will simply add thirty to her total; she can collect but not use money; and the Librarian will ignore her. Finally, since she doesn't play by the RPG system, she can't collect weapons and armor, so they'll be replaced by single hearts. Beyond this basic style of play, even though Maria borrows moves from both Richter and Alucard, she is her own fighter.
 Maria,
overall, is tougher than Richter because she can receive more damage before
dying. Also, she can carry up to 999 hearts. Maria, like Alucard, has
a magic meter that is used to power most of her regular and magical attacks.
Even though it slowly replenishes itself over time, it tends to drain
quickly, which forces Maria to rely on her endurance and evading skills
instead. To start: Maria uses the A button for her charge ball, which
can be used to blast a single fireball or an attack powered up to three
levels by holding the button down before releasing: Maria,
overall, is tougher than Richter because she can receive more damage before
dying. Also, she can carry up to 999 hearts. Maria, like Alucard, has
a magic meter that is used to power most of her regular and magical attacks.
Even though it slowly replenishes itself over time, it tends to drain
quickly, which forces Maria to rely on her endurance and evading skills
instead. To start: Maria uses the A button for her charge ball, which
can be used to blast a single fireball or an attack powered up to three
levels by holding the button down before releasing: |
|
|
~
|
 |
|
Blue
|
Maria simply fires
a larger fireball
|
|
|
~
|
 |
|
Yellow
|
Maria fires a glowing
sphere, each of its residual flames able to inflict damage
|
|
|
~
|
 |
|
Red
|
Maria fires an expanding
laser with circling currents for repeated damage
|
The charge ball allows Maria to fight from a distance, but since it drains the magic meter accordingly, overuse of this attack will leave her without a long-range option. Mostly, Maria will have to instead use the C button for her high and low kicking attacks.
.gif) |
 |
|
While standing,
she delivers a side kick
|
While ducking, it's
a quick sweep
|
Additionally, Maria can use both her basic charge ball and kicking attacks in the air for slightly different variations. While she fires the charge ball forward by jumping and pushing A, it can be aimed diagonally by holding down while pushing the button. Pushing B in the air result in jump kick.
 |
 |
|
Avoid attacks and
fire
|
For a quicker attack,
come in with a kick
|
![]()
 As
mentioned: Maria borrows some moves from Richter and Alucard. Her main accessibility
move is the triple jump, which she can use to bob and weave around and over
enemies and platforms alike. After pulling off the second jump, Maria can
turn it into yet another offensive move by pushing down plus B--Maria will
use Alucard's overhead jump kick to strike and rebound off of the heads of
enemies; after connecting, Maria can pull this off again and again until it
misses or until she receives damage.
As
mentioned: Maria borrows some moves from Richter and Alucard. Her main accessibility
move is the triple jump, which she can use to bob and weave around and over
enemies and platforms alike. After pulling off the second jump, Maria can
turn it into yet another offensive move by pushing down plus B--Maria will
use Alucard's overhead jump kick to strike and rebound off of the heads of
enemies; after connecting, Maria can pull this off again and again until it
misses or until she receives damage.
Her other accessibility move is the
super jump--pulled off by hitting down, up then B--which can propel her upward
more than four-times a regular jump; this can be used again and again while
in the air, and it acts as an offensive move that slashes through enemies
on the way up. Unlike the other two heroes, Maria can aim the super jump sideways
by quickly pushing forward after the initial motion; this will allow it to
cover more ground at an even greater speed. Least useful is the back-dash,
which she can use to slide out of danger.
|
|
To get around faster on the ground, Maria can pull off the roll and tumble (from her Rondo days). By pushing down plus B, Maria will charge forward and execute a flipping kick at its conclusion. This can be used for speed and to cut through weaker enemies. | ||
 |
~
|
 |
|
| To get around faster, otherwise, Maria can dash by quickly pushing the directional pad forward twice. While dashing, Maria can leap farther in a single bound, for each sequence of the triple jump. Also, while dashing, Maria gains a new kick--a long-lasting diving kick that hits off of enemies and propels her backwards. | |||
 |
|||
Since we're dealing with button combinations, made popular by the Street Fighter games, Maria brings along her own super punch that can be pulled off by pushing, in one motion, down, down-forward, forward plus A or C. This move, while devastating, isn't too precise, and it greatly eats away at her magic meter.
 |
|
Ryu never pulled
this off
|
The height of Maria's powerful magic ability is demonstrated through the conjuring of her animal friends. By executing more such button combinations, Maria can call upon four of her Rondo animal friends for extra destruction. These, more than anything, will sap her energy meter, but it will be worth it if you hope to finish off Galamoth, Beezelbub and Shaft.
Tiger
 |
~
|
 |
|
Up, down, down-forward,
forward plus A
|
Maria will send
flames pouring out for a long period
|
Turtle
 |
~
|
 |
|
Back, up-back, up,
up-forward, forward plus A
|
20% of Maria's energy
meter is restored
|
Falcon
.gif) |
~
|
.gif) |
|
After holding up
for two seconds, press up-forward, forward, down-forward, down plus
A
|
An owl familiar
will come to Maria's aid for a short time, darting at enemies with its
claws extended
|
Dragon
 |
|
Left, right, down,
left, right plus A
|
.gif) |
| Maria will release a lengthy blue dragon, which she can control using the d-pad to steer towards enemies. Maria cannot be harmed during the period in which the dragon is flying around. |
Invincibility
![]()
| Starting from "Up," make a 360-degree clockwise motion on the d-pad and hold up for two seconds, then hit down plus either A or C. Maria will summon forth all of her animal friends, who'll offer her temporary invincibility, wherein she can move and fire more quickly and damage enemies through physical contact. |
Maria can also use three of the mystic weapons in different ways: The axes, which she can throw in sets of threes; daggers, where are also thrown in threes, with a gain in size and speed; and holy water, which waves higher than when Richter or Alucard use it.
.gif) |
.gif) |
|
Axes: Each has
a slight homing ability
|
Holy Water: Watch
'em become engulfed
|
.gif) |
|
Dagger: They're
longer and stronger
|
Additionally, Maria can summon all of the animal friends at once for limited-time invincibility by pressing up, up-forward, forward, down-forward, down, down-back, back, up-back, up for two seconds, down and then either of the attack buttons.
Other Tips
Regular Castle Map

Inverted Castle Map

These are the complete maps of the regular and inverted castles. Finding all of these locations and filling in all of the spaces will result in attaining the best percentage. The two new areas aren't too hard to find: The Underground Garden's entry panel is right at the start of the Castle Entrance, near the drawbridge; it opens when the switch in the Marble Gallery is pushed. The Cursed Prison is located at the bottom-most point of the Marble Gallery, right past the Ctulhu; it exits into the Underground Cavern's upper labyrinths.
The Reverse Castle: In order to enter the reverse castle and thus receive a good ending, you'll have to do a little extra work before fighting the Richter boss. If you instead reach Richter too early and kill him, you'll earn a bad ending and find no access to the reverse castle. To prevent this from happening, first collect the Silver and Gold Rings:
- Silver Ring: The Silver Ring is found in the Royal Chapel, beyond a room whose floor and ceiling are lined with spikes. You can't successfully fly in between the obstacle as a bat because there's a door blocking the way--instead, equip Spike Breaker armor to break through the spikes.
- Gold Ring: This is found right after you defeat the Succubus in the Underground Cavern.
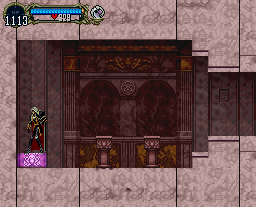
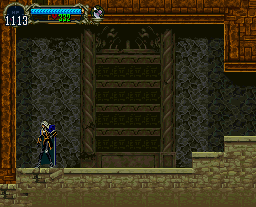
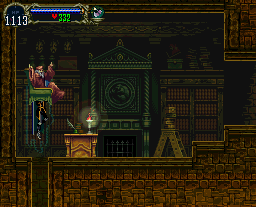
Now equip both rings at the same
time and head to the giant clock room (where you first met Maria) in the
Marble Gallery. The action will pause and thirteen gongs will cause the
ground to open up beneath you. In the hidden room below, you'll again meet
with Maria, and, by now, she'll be sure that Richter is under something's
control. After defeating her in a test battle, she'll award you with the
holy glasses, which you can then wear during the Richter boss battle to
see the real evil essence. Strike this floating essence while carefully
avoiding Richter and you'll eventually break its control over him, and this
will allow for the real story to continue.
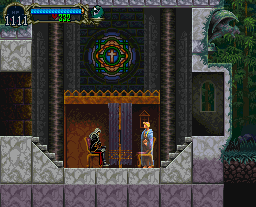
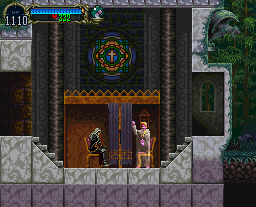
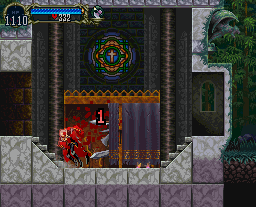
 Slogra,
Gaibon Early: This
one's easy to pull off. After meeting Death early on (when he takes away
your weapons and generally taunts you), continue on through the connecting
hall and enter into the Alchemy Laboratory. After entering the Lab, immediately
go back through the door and return to the previous area--back to the
room where you met Death a few seconds ago. Slogra and Gaibon will be
in that small room, and they'll give you a little test battle. Gaibon
will remain airborne while Slogra tries to corner you. After a while,
when you strike either of them enough times, Gaibon will grab Slogra in
tow, and they'll retreat to their rightful place in the Alchemy Lab. Slogra,
Gaibon Early: This
one's easy to pull off. After meeting Death early on (when he takes away
your weapons and generally taunts you), continue on through the connecting
hall and enter into the Alchemy Laboratory. After entering the Lab, immediately
go back through the door and return to the previous area--back to the
room where you met Death a few seconds ago. Slogra and Gaibon will be
in that small room, and they'll give you a little test battle. Gaibon
will remain airborne while Slogra tries to corner you. After a while,
when you strike either of them enough times, Gaibon will grab Slogra in
tow, and they'll retreat to their rightful place in the Alchemy Lab. |
The Sound Test: Nocturne In the Moonlight features a sound test that you can enjoy from the game's start. After hitting the Start button, you can cycle down and find the "Sound Test" feature. Also, when you complete the game with Alucard, you can return to the sound test and listen to the voice samples of each of the three selectable characters.

Hidden Elevator: In the Outer Wall section of the castle rests an out-of-order elevator that can activated by hitting a switch; however, another of these elevators exists. To reach it, go into the room in the lower part of this section--the one guarded by an Armor Lord. Break the leftmost wall and stand in the crack until you hear a Simon's Quest-like sound. An invisible elevator will now transport Alucard (or Richter, who can use this trick for access) to the room below, which will allow you to collect some weapons you could ordinarily only collect later.

Bat Brothers: This is sent in by antiposeur@mindspring.com: This is simple enough. First make sure that you've collected the bat card and the soul of bat relic. Once you have both, turn on the bat familiar via your inventory. Normally, a single bat would join and help Alucard. But if you get the bat familiar up to level 20 and then transform Alucard himself into a bat while the familiar is turned on, three bats will join him instead--all of which can mimic Alucard's bat powers, including fireball and Echo of Bat attacks. If you are struck during this time, Alucard will go back to regular form, and two of the bats will fly off.
 A
Helping Hand: In the Reverse Entrance, in
the main halls, flea man-mounted skeledragons called Orobourouses clutter
up as much space as possible by bouncing all around, serving as good team
members for the other enemies in this location. But if you'd rather have
one of these on your side, instead, free it from the flea man's
control by slaying the little guy. The Orobourous will fly near your position
and destroy the Wargs, Fire Wargs and other demons that get in your way. A
Helping Hand: In the Reverse Entrance, in
the main halls, flea man-mounted skeledragons called Orobourouses clutter
up as much space as possible by bouncing all around, serving as good team
members for the other enemies in this location. But if you'd rather have
one of these on your side, instead, free it from the flea man's
control by slaying the little guy. The Orobourous will fly near your position
and destroy the Wargs, Fire Wargs and other demons that get in your way. |
Holy Flame Power: In the Dracula X games, Richter could use a flame-whip slash by pushing the item-crash button while no sub-weapon was in his possession; he has a similar power if you use him in this game: By pushing the item-crash button without having a sub-weapon equipped, Richter, himself, will become a flaming entity, as will his hunter whip. During this long-lasting period, Richter's power and defense will increase. Though, this power does come at the expense of your heart-total.

Say Your Prayers: In the Royal Chapel, you may remember locating a confessional in the area's lower half. Though, it's not there just for show; by seating Alucard in the chair to the left, you can find reward (or pain) in confession. If arriving on the scene is a blue-cloaked holy person, it'll bestow blessing and then drop for your convenience a recovery item (like, say, grape juice). If instead a gray-cloaked holy person arrives, the curtain will close and you'll find yourself at the end of a multi-pronged assault. For fun, you can place Alucard in the chair on the right and play the part of good listener.
 |
 |
|
A blue-cloaked holy
person...
|
... will supply.
|
 |
 |
|
A gray-cloaked holy
person...
|
...will deprive.
|
Librarian Secret: The Master Librarian ordinarily offers you an array of items at set prices--but his room also contains other rare items you can get for free. If you're in his little desk room, you'll see that his chair is placed over a narrow gap. Head to the room directly below this, where you can see the gap's bottom opening. Using your super jump, jump into the narrow gap and lift the Librarian up into the air--do this multiple times and make sure that he doesn't hit the ceiling before landing back in place. If you do this correctly, you will receive the Ring of Arcana. If you do it correctly twice thereafter, you'll receive Axe Lord Armor and the Dracula Tunic.
Stair Master: The Royal Chapel's entrance area is infamous for its long stairway, which is swamped by bone pillars and corner guards. While making your way up is never fun, you can make the reverse trip a joy ride while turning the tables on the stair-guarding foes. It's simple: When entering the room from the right, locate the bone pillar with a spiked ball in place of its upper skull; vanquish the lone skull and then follow the spiked ball as it bounces its way down the entire stairway, destroying any enemy in its path.


An In and Out Experience: This tip is sent in by Kong: "To start, you must have the Duplicator and at least a Power of Sire, a Pentagram or a Bat Pentagram, and you must be in the reverse castle. Go to the reverse chapel, to the room where the Spectral Sword lurks. Equip the duplicator and, say, the power of sire and any familiar you want leveled up. When you enter the room, from a bottom entrance, activate the power of sire; the Spectral Sword should die along with all of its javelins and shields. Make sure all shields and javelins die and then quickly go back to the previous room. If you managed to wipe out the sword and all its components with one activation, keep repeating the process by going back and forth between the two rooms until the familiars reach level ninety-nine. Each process should raise the familiars' experience by twenty-thirty-plus."
 Become
a Gargoyle: When Alucard comes in contact
with a yellow Medusa Head or the petrifying skull attacks of a Stone Rose,
a stone curse becomes of him. However, there's a small chance that either
of these methods could lead to Alucard becoming a giant stone gargoyle--a
rare but useless opportunity this turns out to be, as nothing special
comes with being a gargoyle. After pushing the directional pad back and
forth, Alucard will shake away the pebbles as he does for a regular stone
condition. (As a special note: You'll also ee this stone gargoyle form
near the entrance area to the Underground Garden.) Become
a Gargoyle: When Alucard comes in contact
with a yellow Medusa Head or the petrifying skull attacks of a Stone Rose,
a stone curse becomes of him. However, there's a small chance that either
of these methods could lead to Alucard becoming a giant stone gargoyle--a
rare but useless opportunity this turns out to be, as nothing special
comes with being a gargoyle. After pushing the directional pad back and
forth, Alucard will shake away the pebbles as he does for a regular stone
condition. (As a special note: You'll also ee this stone gargoyle form
near the entrance area to the Underground Garden.) |
Spells: Below is an image that will help show the correct button combinations for each spell. Use these button combinations at any point in the game to learn the spells.

![]()
|
The
Codes
|
As opposed to the PlayStation version, the Saturn version's assortment of codes are available to the player right out of the gate. That is, you don't have to clear the game with any of the characters before you can put to use the "Name" codes and instead immediately reap the benefits.
Richter's Alternate Outfit: On the character-select screen, highlight Richter Belmont. Now hold up and then hit the start button. As evident in the horse-riding intro scene, Richter will be wearing a new outfit, a blue cloak that matches the game's official artwork.


