 The
intro scene is stripped down to one screen: the one in which the Belmont
ancestors size up the castle. Though, the visual's rendering is very different
from the finalized version's. Its color-scheme is instead a simple tetradic
mix of red and blue, and the characters and the environments are uniquely
rendered. The heroes, in particular, are unidentifiable; the pair is portrayed
as a generic warrior and wizard, whereas in the final version they're clearly
Trevor Belmont and Sypha Belnades.
The
intro scene is stripped down to one screen: the one in which the Belmont
ancestors size up the castle. Though, the visual's rendering is very different
from the finalized version's. Its color-scheme is instead a simple tetradic
mix of red and blue, and the characters and the environments are uniquely
rendered. The heroes, in particular, are unidentifiable; the pair is portrayed
as a generic warrior and wizard, whereas in the final version they're clearly
Trevor Belmont and Sypha Belnades.

The
title screen has no background graphics, and it features a different title-screen
theme--one that's exclusive to this demo.
There's
no game-starting intro sequences.
Rather, after selecting "Start" in the title screen, we immediately
jump into action.
Also,
there are no between-stage transition screens. Once a stage is completed,
and the score his been tallied, the game immediately sends you to the next
stage.
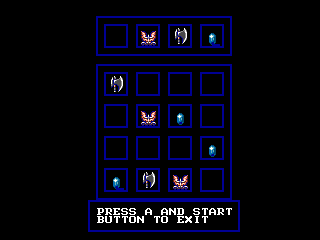
The
password screen features a rudimentary design. There is no background visual.

If
you enter the Konami code (up, up, down, down, left, right, left, right,
B then A) on the title screen, you'll unlock a level-select option.
It appears on the title screen's top portion.
You can manipulate the number by pressing the A, B and C buttons. A increases
the number by one, B increases it by ten, and C decreases it by one. Only
selections 0-24 load stage sections; if you select anything beyond, the
game will crash after the character-select screen fades out.
The
options screen offers Easy and Normal difficulties, though there doesn't
seem to be any difference between the two modes.
Observing
the options screen, we see that "Easy" is the default mode, and
the starting life-total is 4 rather than 3.
The "Press Start to Exit" text is missing. The SE value stops
at 98, whereas it goes up to 206 in the finalized version. The BGM value
stops at 19, whereas it goes up to 30 in the finalized version. The Stage
4 and 5 tracks (which aren't heard during the demo) have different instrumentation.
The chilling-sounding BGM9 track is exclusive to the demo and particularly
to this options screen. And, oddly, the stage-clear track is missing from
the BGM selection.
You
can further manipulate the beta by inputting commands on the second controller.
There are three things you can do: (1)
Stage warp to the proceeding or the previous stage by holding up or down
on the d-pad and pressing the A button, respectively (note that if you attempt
to warp to a previous stage while on 1-1 or warp to a proceeding stage while
on 2-6, you'll arrive on a glitched, platform-less version of 2-5 and immediately
fall to your death; you'll then restart on 2-5). (2) Replenish all of your
health and max out your gem-total by pressing the B button. And (3) toggle
off the music and sound effects by pressing the C button (they won't toggle
back on until you enter a new section or die).
This
build is rough around the edges. There are minor graphical glitches (discolored
objects and some sprite-flicker). The
action moves slower and with a slight jitter. Character movement is a bit
stiff. There are collision-detection issues: platform edges aren't always
solid, and sloped surfaces sometimes feel bumpy; the heroes' stair-climbing
is most affected by this, the action's animation observed to be very choppy.
The hero characters fall forward a bit when they drop from a platform, and
at the same time they become unresponsive. And the frame-rate dips significantly
when more than six characters are onscreen and when multiple death animations
are occurring at the same time; when this happens, the music, too, slows
down.
There
are some noticeable palette differences.
The
sound effects are somehow more primitive- and squeakier-sounding.


The
character-select boxes feature more-basic background graphics--more-simplified
brick patterns.
The
"Stage Start" and "Pause" title cards are missing.
Sub-weapons
aren't centered in the UI's sub-weapon box.
You
can't jump off of stairs. Also, you don't walk down stairs automatically
and have to instead hold downward when approaching a staircase.


Strangely,
if the first candelabra you strike is one of the sub-item-holding variety,
it'll drop a coat-of-arms power-up rather than a sub-weapon.

