Prototype Version

During the early-mid portion of July, 2020, Nintendo suffered a number of massive data leaks that released onto the Internet decades'-worth of the company's development materials. Among them was this item: a prototype for Super Castlevania IV--a 1MB demo that contains unfinalized versions of the game's first seven stages. The layouts are largely similar to the finalized version's, yes, yet the stages contain some significantly different elements--some very interesting structural, graphical and coding differences. These are listed below.


General Differences

The intro scene is missing. After the Konami splash-screen displays, the game immediately takes us to the title sequence.
There's no name-entry screen leading into the pasword screen. You immediately arrive there with "Konami" entered as your name.
T
here's no music on the password screen. Also, passwords don't work (save for two that drop you into stages that can't be normally accessed).

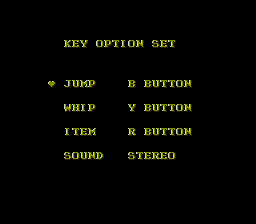
The options screen is missing the Background Music and Sound Test functions.
The game-starting intro, in which Simon sizes up the castle, is missing. Instead we immediately cut to the action.
There are a few audio differences: Compared to their final versions, music tracks contain unique compositional elements--anything from some rather distinct-sounding instrumentation to major differences like the addition of extra note strings, completely altered composition, and expansion via the addition of wholly original sections.
There's also prototype-exclusive theme (you can listen to both it and the demo's familiar tunes on the game's soundtrack page).
The death jingle is missing.
Some sound effects are missing. Also, certain actions are communicated via borrowed sound effects instead of unique ones. You will, for instance, hear the title-screen wolf howl when you earn a points-based 1up.
The game's colors are bolder and brighter, more so where the enemy characters are concerned.

The between-stage map screen features a uniquely rendered game world. This one is basic-looking and purely diagonal. The traced path is highlighted, still, but not marked with stones. Strangely, you can pause while on this screen. Also, interestingly, the scene's animation is accompanied by an underdeveloped version of the Treasury track.
There's some different enemy- and item-placement. Spawn-rates and spawn-memory differ (that is, enemies respawn after the screen scrolls half-a-screen's length where in the final version they don't reappear until it's scrolled a full-screen's length).
As mentioned, there are certain level- and visual-design differences. Some background elements are missing while there are others that are exclusive to this prototype.
The life counter doesn't count down to zero. If you die when the counter reads "1," your game is over.
Certain enemies and items sport unique appearances.
The stopwatch sub-weapon doesn't function.
The invisibility potion's invincibility effect doesn't last nearly as long.
Rather than walk or fall in from offsreen, bosses just simply appear. The accompanying boss music is structurally
the same but much heavier on percussion, the tune's beats sounding more like the constant banging of bongos.
The stage-clear jingle uses different keys and is lower-toned.
There are no breakable walls (save for the uniquely composed wall that can be cleared away
in Stage 3's cavern area) and thus no hidden pot roasts.
You have to do more work with your sub-weapons--have to score many more hits with them--to earn double- and triple-shot multipliers.
In vertical or multi-directional sections, you can walk upon platforms that are positioned just below the camera--just offscreen.
The background and environmental animations continue to execute when the game is paused.
Two HUD values are different: You begin with 5 lives instead of 4, and the time-limit is increased or decreased depending upon the stage. Also, the font is colored orange-red.


Stage 1

The background in Stage 1's opening section is bereft of mountains (particularly the classic skull-shaped mountain) and flying bats. Standing in for them are a full moon and miniaturized version of Stage 2's waterway (a cool little preview the designers should have fit in elsewhere).
The stage's musical theme (Theme of Simon) features some unique-sounding instrumentation. The piece is lighter on guitar strains; its notes aren't as pronounced; and its percussion differs.
The time-limit is set to 500 seconds compared to the finalized version's 450 seconds.

There are many more skeletons and bats populating both planes of the gated section.

Bone pillars sport a different look. They appear to be carved out of stone, and its two heads are connected by a literal pillar. In certain instances, bone pillars just suddenly appear, surprising you.
There are no clubbing knights.

The barn area's opening section sees an early appearance of a hellhound (of a black-colored variety), which behaves as expected.

Viper swarms also sport a different look. I'd describe them as being green mounds of entangled snakes.

Medusa heads are silver-colored.

Ghosts look different. They're longer in width; their skeletal bits are more-realistic-looking; and they're surrounded by white flames.


Stage 2

Most noticeable is that the stage features a musical theme that isn't heard in the finalized version. The piece has a dissimilar horror-type quality to it; its series of sharply struck notes provide it that unique character.
The time-limit is set to 500 seconds compared to the finalized version's 450 seconds.

The plant men have larger frames, are tendrilled, and display a rough-looking-but-unique flickering animation.

The graveyard-inhabiting zombies have green flesh and appear to be wearing tattered masks.
Ravens appear in the stage's opening section.

The goblins' appearance is a bit different. They're red-colored, spikier, and meaner-looking.

A red-colored variety of fishman appears in the early portion of the stage's swamp section. They behave as expected.
The moving platform that carries you up to the bridge is higher-placed; accessing it requires an extended, more-calculated jump.

The bridge uses some uniquely crafted assets.
There's no thornweed. In some instances, they're replaced by goblins.

Medusa sports a unique color-scheme. She has light-beige flesh, a brownish tail, and dark-green snake hair.

Strangely, even though the Medusa battle represents the stage's halfway point, a stage-clear orb appears after she is defeated. After you procure it, your score is tallied before you're ushered onto the next part of the stage. At that point, the time-limit resets to 400 seconds.
In the waterway section, the water never reverses its flow.

The claw enemy is greener, and its kind is more numerous.

Skeletons, frogs and bone scimitars appear in the waterway section.
It takes two hits to kill gargoyles.


Stage 3

The cave-area music is an extended version of the theme. It includes a whole extra final section.
The time-limit is set to 340 seconds compared to the finalized version's 650 seconds. You barely have enough time to complete this stage. You can only afford to dally for a few seconds.

The cave area is home to a prototype-exclusive enemy: a teleporting bat. This one continues to teleport to alternate locations wherein it flies up and down. It continues to stalk you until you kill it.

There's no stone man enemy and instead a rather indistinguishable, animation-lacking foe that is best described as a moving slab of granite. It moves much slower than the stone man but its three-times as tough. And it doesn't break down into smaller versions of itself.

Ghosts appear in the cave area.
The waterfall area uses the cave's musical theme.
There's no thornweed in the waterfall area.

In the waterfall area, there are more balls of destruction circling the platforms, their presence making for more harrowing jumps.

Stage-wide, there are a few structural differences. Some platforms are chopped down creating more distance between certain sets of them. In two or three cases, you now have to make near-pixel-perfect jumps to clear distances.


There are some notable differences in the opening segment of the sunken city area: Early on, a ball of destruction appears on the platform placed above the crumbling blocks. Less debris drops. There are no ghostly eyeballs. And a certain blocks are missing.

At the start of the sunken city's second segment, there's some pretty ridiculous enemy-placement. To clear the gap, you have to launch yourself off a platform that's being circled by a ball of destruction and land on one that's being guarded by a skeledragon. If you're lacking for a sub-weapon with which you can cheaply pick off the skeledragon, you'll have to tank your way across the gap and hope that any resulting enemy-contact doesn't knock you into it.
In the sunken city area, there are no clubbing knights, and bone pillars replace skeletons.


Stage 4

This entire stage uses an extended version of the dungeon theme. This one contains a lengthy intro section that's comprised entirely of repeated guitar and drum strings. Also, the piece uses a different horn instrument.
The time-limit is set to 300 seconds compared to the finalized version's 550 seconds.

A white-colored variant of the charging table enemy appears in the stage's earliest segment.
Sitting atop the charging table is another prototype-exclusive enemy: a
silver-dome-plated dish containing a undead chicken. When you move to within proximity to the dish, it begins to fly around and stalk you. Though, really, the long-necked chicken does most of the work, its very presence working to create a troublingly large obstacle. (This enemy reminds me of Haunted Castle's attacking silverware. That's not surprising, considering that Super Castlevania IV takes a lot of inspiration from that game.)
The teleporting bat appears in this first area.

The snapper casket enemy appears in the first area's second section.
There are no wall widows in the first area.

Medusa heads appear in the first area's final section.

The Puwexil battle's programming and implementation are largely incomplete. Puwexil has no attached transparency effect. He moves around aimlessly. He gets knocked back whenever he's struck. And debris doesn't fall from the ceiling whenever you strike him.
A stage-clear orb appears after Puwexil is defeated. After you procure it, your score is tallied before you're ushered onto the next part of the stage. At that point, the time-limit resets to 400 seconds. At that point, the time-limit resets to 500 seconds.

Medusa heads appear in the turning rotating-cylinder area.
Teleporting bats appear in the final area.
Before the Koranot battle can begin, the unusually-low-pointing camera
has to snap upward into its proper position--correctly orient itself.

Koranot's chamber is structurally different. There are no moving platforms and instead two low-positioned platforms in the room's bottom-left corner, where they create a somewhat-fortified pocket. Koranot is unable to enter into it.


Stage 5

The Stage 3 waterfall theme plays in both areas.
The time-limit is set to 500 seconds compared to the finalized version's 170 seconds.

In the second area, Gremlin-carrying harpies and gargoyles appear right from the start.
The moment you walk through the castle's front door, the demo ends and you're instantly sent back to the splash/title screen.


Stage 6

The rest of the prototype's stages can be accessed only via special means. You can access Stage 6, and therein the proceeding three stages, using the password shown above (thanks to Eithereor for supplying the image). Considering their hidden nature, it's no surprise that they're more incomplete than any of those seen previously. Though, in comparison to the proceeding three stages, Stage 6 at least has working assets in place.
The time-limit is set to 500 seconds compared to the finalized version's 600 seconds.
The stage recycles that same extended version of the dungeon theme.
Most sound effects are missing.
The stage is largely empty, and most enemies are missing. I'll mention only those that appear.
The majority of candelabras drop hearts. There are no money bags or sub-weapons save for a single cross that can be found in 6-2's secret room.

Cruelas appear where they should, though in this version they sport pale shades of brown and green.
The secret room is included (the one you access by breaking through the floor at the start of section 6-2), yes, but the dead mate and his pet hound are absent from it.

Axe knights are silver-colored, and they rarely toss axes. They die in three hits whereas in the finalized version you have to strike them four times to destroy them.

The sirens have black hair and wear black dresses. A few of them show up in unexpected places.

Classical ghosts have black hair and wear black suits. A few of them, too, show up in unexpected places.

In section 6-2, there's a entire row of crumbling blocks connecting the room's two halves rather than four spaced-out crumbling blocks.
During the Dancing Specter fight, the Boss 1 theme plays.


The Dancing Specters' respective garb is uniquely detailed--grainy whereas it's smoothly textured in the finalized version. Fred sports a familiar-looking color-scheme (though, his collar is orange rather than red) while Paula wears a purple dress and red shoes.
After the Specters execute their lance-throwing move, they remain still for an extra three seconds.
The prototype freezes after you strike the finishing blow.


Stage 7

And now we come to the part of the prototype in which stages are more than "largely unfinished"--they're entirely rudimentary in form. Their layouts are mapped out, yes, but all we see are the basic framework and placeholding elements. There are no background or foreground graphics. Surfaces are comprised mostly of basic brown blocks. There are no minor enemies present. Candelabras drop nothing but hearts and cease appearing in successive stages. And the obstacles that exist are graphically and mechanically underdeveloped. The only challenges therein are basic platforming and boss battles.


There are no transition screens leading into these castle stages. Furthermore, there's no castle map at all. Immediately after completing one stage, you're abruptly dropped into the next.
You begin these stages with zero hearts, which becomes a problem. If you procure a stage-clear crystal when your heart counter is at zero, the counter cycles from 99 down to zero and then proceeds to loop endlessly, which prevents the stage from ending; the score simply tallies forever. To prevent this from happening, you'll at some point have to purposely kill yourself so that you can restart with the default five hearts.
This stage, the future library, reuses the extended dungeon theme.
The time-limit is set to 500 seconds compared to the finalized version's 550 seconds.

There are no levitating-book platforms. Standing in for them are series of platforms that simply move either up and down or left to right.

The flipping platforms exist, but they look a bit different. For whatever reason, they have gold trim (when they're at rest, at least).
The construction of Sir Grakul's chamber is different; it's all flat ground.


Sir Grakul is silver-colored. Though, parts of his plating (the cuisses) remain gold-colored.
Grakul's death animation is glitchy; after the initial explosion, artifacts start appearing in random locations before flying off.


Stage 8

The time-limit is set to 500 seconds compared to the finalized version's 450 seconds.
This stage, the future dungeon, has as accompaniment the extended dungeon theme, which is finally used in the correct place.

The crushing spike contraptions function properly, but they're both basic- and indistinct-looking.

In place of the pools of poison/blood is an underdesigned marshy substance. It pulls you under all the same, though it doesn't inflict any damage.

The swinging spike contraptions are also basic- and indistinct-looking, and they're connected to ceilings not by chains but rather by eight observably unconnected small hearts (obviously the correct assets hadn't yet been created.

The undulating spike beds, too, are basic- and indistinct-looking.

Crushing spike contraptions encountered later on have attached to them a unique lowering animation--a glitchy-looking animation in which 16-by-8 brown blocks stand in for the later-added pulley-chain combinations.
Crushing spike contraptions lack any timed sequencing. Instead, individual spike contraptions begin to function only at the moment they're scrolled onto the screen. If you're aware of this, you can manipulate the second of the two contraptions seen in the image above by keeping it offscreen until you wish for its animation to activate--force it to sync up with the first.

Placeholding for the falling lances are sets of stringed-together candelabras. Each object is comprised of four vertically aligned candelabras.

8-1's collapsing bridge is comprised of unattractive-looking brown-and-gray blocks with turquoise speckle.
There are no placeholders for the undulating, stabbing spikes--those under which you have to crawl. The stage segment in which they're supposed to appear is completely empty.
There are no disappearing-reappearing blocks near the stage's endpoint--no placeholder objects for the platforms that comprise the "Vegas Bridge," as it's affectionately known. There are only simple brown blocks.

Frankenstein's color-scheme is different: His flesh is turquoise-green, his suit is an earthy brown, and both his shoes and hair are textured with a combination of reddish-brown hues.
You can't destroy the vials that Franky throws.
You can be damaged by Franky's death animation.

After Franky is defeated and the crystal appears, the screen unlocks, allowing you to leave the boss room and backtrack through the stage. Though, really, you can only travel about three screens over before you come across platforms that are to high to access.
If you kill Franky while he's moving about near the screen's edge, his death animation will glitch wildly and cease after about two seconds, at which point the game freezes up.


Stage 9

The time-limit is set to 500 seconds compared to he finalized version's 650 seconds.
This stage, the future treasury, reuses the extended dungeon theme.

Generic sloped surfaces stand in for gold piles.

Some blocks' lower halves are replaced by pairs of 90-degree-rotated copyright symbols.
There are no disintegrating platforms. Placeholding for them are pairs of the aforementioned blocks whose bottom halves are formed from 90-degree-rotated copyright symbols.

The pools of gold coins into which you can sink have as placeholder that aforementioned underdesigned marshy substance.
There are no falling blocks in section 9-2.

The protrusive cave structures aren't present in the background, no, but we can tell where they're going to be placed. We do that by observing the objects that mark the future positions of their suction holes; each is represented by a block formed from a 2-by-2 arrangement of 90-degree-rotated copyright symbols. These objects possess the property of spikes, which is to say that contact with them will kill you instantly.

The floating bat rings, onto which you can latch your whip, are discolored compared to those seen in the prototype's earlier stages.


The Zapf Bat breaks apart into three smaller bats at a much-earlier time--when only four bats of its health meter have been cleared away.
The gold shards that break off from the Zapf Bat and its offspring don't damage you. In fact, the smaller bats and their attacks can't damage you at all! All they can do is knock you back.
Once you deal the final blow to the Zapf Bat, the prototype freezes, apparently signaling the exhaustion of its content (or so you'd think).


Stage A

Stage A can only be accessed via a password or Game Genie/Action Replay codes. You can naturally progress to Stage B by clearing it.
The time-limit is set to 500 seconds compared to the finalized version's 600 seconds.
This stage, the future clock tower, reuses the extended dungeon theme.


There are no turning gears or other clockwork components; placeholding for them are simple rows of brown blocks, rows of blocks whose lower halves are replaced by pairs of 90-degree-rotated copyright symbols, or rows that are formed from a combination of both types.

A-1's rotating wheels of bats rings are present, but since there are no accompanying background graphics, the rings appear to by floating about empty space.

Akmodan has only the flying-shard attack. His shard attack hits for only one bar of damage where in the the finalized version it hits for two bars of damage. He only hangs around a location for about four seconds before teleporting to another. And his death animation can damage you.


Stage B

Stage B is accessed naturally from Stage A, but you can also access it via the password shown above.
The time-limit is set to 500 seconds compared to the finalized version's 999 seconds.
This stage, the future castle keep, reuses the extended dungeon theme.

There's no crumbing bride in section B-1. Placeholding for it are simple rows of brown blocks and rows of blocks whose lower halves are replaced by pairs of 90-degree-rotated copyright symbols.

You run into a major problem when you enter section B-2 (the "death tower," as I call it). The placeholders for the falling-stair pieces are stair pieces that have 90-degree-rotated copyright symbols attached to their bottom portions; they're the type of symbols that possess spike properties, and as a consequence of such, they instantly kill you if you make contact with them. So under normal circumstances, it's impossible to advance past the screen's very first staircase. If you desire to access the proceeding sections, you're going to have to turn to Action Replay for help. Specifically, you'll need to input code values of 7E008638 and up (by increments of one) to reach B-3 and beyond. And you'll necessarily have to continue inputting codes to access each successive section, since one doesn't naturally transition into the next; rather, the game freezes the moment you exit a section. So from this point onward, I'll be using these codes to piece together the rest of the prototype.
In B-2, by the way, there's no spiked gear to chase you.
Boss music (Boss 1) plays during the Slogra, Gaibon and Death fights. In the finalized version, this doesn't happen; rather, the normal stage theme (Room of Close Associates) continues to play during these battles.


Slogra doesn't drop into his chamber; he simply appears. He lacks his dynamically changing color-scheme and remains a base brown. When you strike him, he doesn't zip upward, off the screen; rather, strikes only stall his movement for about a half a second; in that moment, he merely grimaces before resuming his forward motion.


The flames that Slogra fires from his spear are purple-colored, and their explosions have the appearance of electrical bursts. Also, in the battle's first phase, he exhibits a prototype-exclusive move: He beak-dashes while holding the spear! And, as is the trend, his death animation can hurt you.
When you defeat Slogra, a stage-clear orb appears. After you procure it, your score is tallied as if the stage were completed. It's not. If the prototype were to adhere to its established formula, you'd be sent to the stage's next section with your HUD values reset, but that doesn't happen here because such coding apparently doesn't exist. The game freezes once your score is finished tallying. Instead you can only access the next section using an Action Replay code.
In the next section, the timer resets to 500.
Gaibon's chamber doesn't lock into place until he appears, so you have the opportunity to retreat back to the section's right side if you wish.

Gaibon's sprite sports a mix of light-purple hues rather than the normal blue variety.


When Gaibon crashes into the ground, rocks, rather than spikes, drop from the ceiling. Also, before taking back to the air, he appears to shield himself from further attack.

Gaibon spews simple-looking fireballs rather than the rotating type seen in the finalized version.

Gaibon's second form sports a mix of light-red hues rather than the normal orange variety.


Phase-2 Gaibon spews a stream of fireballs, as expected, but they're simple-looking fireballs rather than the rotating type seen in the finalized version. And this version of Gaibon spews them directly toward Simon rather than in a strictly-diagonal path.
Phase-2 Gaibon's flight pattern is different. He tends to swoop down at low angles and in doing so cover long distances. This makes it very difficult to avoid making contact with him.
Gaibon's death animation can hurt you.

When you defeat Gaibon, a stage-clear orb appears. After you procure it, your score is tallied as if the stage were completed. Again--it's not. Though, the next part of it can only be accessed via a code. Strangely, the screen unlocks after Gaibon is defeated, allowing you to travel leftward, over to the stairs. You can climb them, yes, but there's no point in doing so; an unseen barrier prevents you from entering the next section via this conventional method. If you scroll the orb after off the screen, it'll disappear, causing the game to softlock.
In the next section, the timer resets to 500.

Death lacks his entrance animation. Instead he merely flies in from the screen's top-right corner; he does so swiftly and wastes no time in dishing out attacks.
Death's death animation can hurt you.
When you defeat Death, a stage-clear orb appears. After you procure it, your score is tallied as if the stage were completed. And again--it isn't. Though, the next part of it can only be accessed via a code.
In the next section, the timer resets to 500.


There are no invisble staircases or platforms in the first room of B-4.
Dracula doesn't appear at the end of section B-4. There's only an empty room that you can leave an any time. The Dracula battle apparently wasn't yet implemented. So this marks the true end of the prototype.


Extras


Oh, but there is actually more to the prototype--hidden stuff that even Nintendo was not meant to see. One such secret was discovered by the people over at The Cutting Room Floor. It's called the "Circular Room," an alternate A-1 block that can be accessed with the Action Replay code 7E008637. It drops you into a giant room that extends multiple screens in each direction; a very long stairway placed at its starting point allows you to access and explore its upper screens. The room is completely empty, so all you're really doing here is taking in the visuals of what looks to be a testing room in which the developers experimented with the SNES' Mode 7 technology. Mainly, we observe its background--a curved wall whose scrolling effect creates the sense that Simon is walking along the exterior of a cylindrical tower. No such environment is seen in the finished game; though, it wouldn't be a stretch to say that the effect lived on in some form--that this particular form of rotation was the precursor to the more-impressive one used in Stage 4's rotating-cylinder room. The textures, we notice, are all taken from stage block 1-2.


If you continue walking right, you'll eventually come to a cliff. If you jump off of it, you'll drop far down into a section filled with garbage tiles, on which you can maneuver. If you drop down from there, you eventually fall into a death pit.


In Media

The imagery in Nintendo Power Volume 28's Super Castlevania IV preview was taken directly from this prototype. If you take a close look at the enemy sprites and textures, you'll see that they match up to those displayed in the screenshots above. (This information was contributed by Casey S. The scans come courtesy of archive.org.)

Back