
![]()
Glitches and Fun Facts
|
When you arrive back at the room in question, the apparent courtyard of mass impalement, Slogra and Gaibon will for some reason be stationed in these rather small quarters, and they'll proceed to make a preemptive strike--a sort of test battle. Gaibon will remain airborne while Slogra attempts to corner you. After a while, when you strike either member of the pair enough times, Gaibon will grab Slogra in tow, and the duo will then retreat to its rightful place in the Alchemy Lab. |
 Slogra,
Gaibon Early: Nothing
really special is required to trigger this event. After early
on meeting Death (when he takes away Alucard's weapons and generally
taunts the hero ), continue on through the connecting hall and enter
into the Alchemy Laboratory. After entering the Lab, immediately go
back through the door and return to the previous area--that is, all
the way back to the room where you met Death just a few seconds before.
Slogra,
Gaibon Early: Nothing
really special is required to trigger this event. After early
on meeting Death (when he takes away Alucard's weapons and generally
taunts the hero ), continue on through the connecting hall and enter
into the Alchemy Laboratory. After entering the Lab, immediately go
back through the door and return to the previous area--that is, all
the way back to the room where you met Death just a few seconds before.
Liberal Media: Symphony of the Night is filled to the brim with so much depth that it spills over to even the game's very media. By taking the game's CD, placing into your PC's CD-ROM drive, and attempting to listen to it with a media player, you'll receive a message from Alucard (or the voice actor, in this case): "As you can see, this is a PlayStation black disk. Cut #1 contains computer data, so please--don't play it. But you probably won't listen to me, anyway, will you?" It will then play a unique jingle (an unnamed tune measuring in at four minutes) that has mixed in a little Dracula's Castle. (Contributed by Hyderman.)
Become a Gargoyle: When Alucard comes in contact with a yellow Medusa Head or the petrifying skull attacks of a Stone Rose, he's overcome by a "stone" status. However, there's a small chance that either of these methods could lead to Alucard becoming a giant stone gargoyle--a rare but useless opportunity this turns out to be, as nothing special comes with being a stone gargoyle. As you rapidly push the directional pad back and forth, Alucard will shake away the pebbles as he does for a regular "Stone" condition.

Wiggle While You Wait: Tired of watching that same ol' loading screen over and over again as you wait through cut-scenes and scurry between castle sections? Well, too damn bad. However, you can find temporary amusement by manipulating the loading screen itself. When the highly organic words "Now Loading" appear over the black screen, push any direction (or multiple directions in succession) on the d-pad to influence the words' very movement--doing so will result in waving, twisting and general rotation of mesmerizing proportions. (Image contributed by Danny.)

Metal Gear Mind Probe: This tip comes to you from ray_e1x3@lycos.com: This is related more to the Metal Gear side. If you have a Symphony save on your memory card when you play Metal Gear Solid, there will be a minor difference in the gameplay: When you reach the telepathic Psycho Mantis boss, it'll tell you how many times you've saved your game, how many items you have, and how you are doing overall; then it'll probe further into your unconscious and say, "I can see into your mind. You like Castlevania, don't you?" Other such characters will also show the ability to read off of your memory card and react accordingly.
 The
Chairman of Castlevania: "Don't
video game heroes ever get tired, what with all that endless running
and jumping?" you ask. The answer is, of course, "Not when I'm paying
$50-plus just for the very privilege of controlling them." Be
that as it may, you can give our hero, Alucard, a much-deserved rest any time
you spot a chair that stands out from the normal background. Simply walk over
to it and push up, which will sit him down comfortably. If you remain idle
for a bit, the fatigued hero will eventually fall asleep and catch a few visual
Z's. (Second image contributed by Danny.)
The
Chairman of Castlevania: "Don't
video game heroes ever get tired, what with all that endless running
and jumping?" you ask. The answer is, of course, "Not when I'm paying
$50-plus just for the very privilege of controlling them." Be
that as it may, you can give our hero, Alucard, a much-deserved rest any time
you spot a chair that stands out from the normal background. Simply walk over
to it and push up, which will sit him down comfortably. If you remain idle
for a bit, the fatigued hero will eventually fall asleep and catch a few visual
Z's. (Second image contributed by Danny.)

When Getting Up Is Too Much Work: What would a Konami game be without such conveniences as continuing from the last save point without having to wait through a "Game Over" screen, the title sequence, the mission select, and the cold gravy we call loading times? Right--something that slipped by the sadists in product management. Fear not, for at least one archaic gameplay component has been assessed: If you find yourself wanting to quit the game at any time and return to the title screen but can't find the option, you don't have to manually reset the PlayStation; instead, simply hold the "Start" and "Select" buttons during the game's live action.
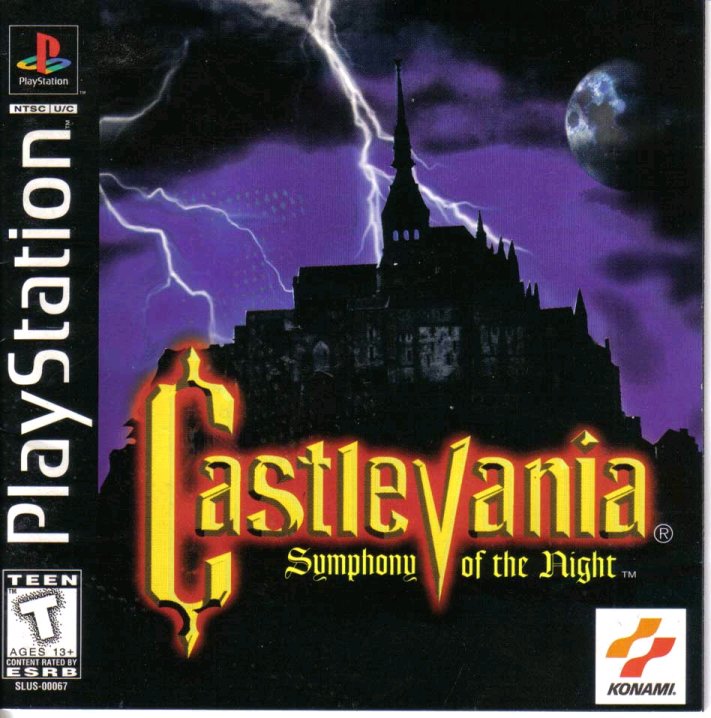
Abbey Normal: The Castlevania crew's penchant for reusing Symphony's assets, specifically its very-well-made character sprites, has become somewhat of a pet peeve for those who have long been following the series. But the game's very cover art (American version) reveals that Konami was in the asset-reusing business even prior to 2002. That's if by "asset" we mean real-life monuments like Le Mont-Saint-Michel, an island housing a very familiar-looking abbey. (Reference and castle image provided by ReyVGM.)
 |
 |
But Really White Men Can Jump: Dracula isn't the only castle resident that enjoys himself a little "hangtime" (as evidenced by his work as showcased all around the Outer Wall)--his son, too, has a gift for excess. Specifically, unbeknownst to many a player, the at-first-limited Alucard can grab a little extra air on his jumps if the player hits the jump button ("X"), releases, and then quickly hits the button again. Beware that the action requires perfect timing. (Contributed by Danny.)
Fountain of Blood: Olrox's Chamber is home to the castle's infamous water fountain, the area surrounding which was always marked by air assaults as launched by eagles and harpies carrying fleamen. Need more proof that this fountain is in fact a well of evil? Well, simply stand in front of it long enough to see its liquid change from water to a stream of blood; confirm further its true nature by jumping up so that the moon, as seen in the background, lines up with the fountain's very structure, which will reveal a demonic figure in place of what was a peaceful-looking angel.
A Shoulder to Fly on: Even a midget helper needs to grab itself some rest and relaxation, so give it a helping hand (or a shoulder, in this case). To do this, activate Alucard's Faerie Familiar and stand still for a prolonged period. After a few moments of inactivity, the Faerie will recognize the situation and rest itself on Alucard's shoulder. When you finally move Alucard, the surprised Faerie will fall of his shoulder with a shriek. (Contributed by Danny.)
 |
 |
Flip-Flop Flame: The candelabras seen castle-wide are themselves part of the haunt's chaotic essence--the embodiment of the trapped souls seeking their escape. Apparently this isn't true of a particularly confused Alchemy Lab specimen that wants to be as far away from the Count's half-breed son as it can manage. That is, the pillar-embedded candelabra in the section depicted below shifts from one part its base structure to the other depending upon Alucard's point of entry (enter the room from the right, it adorns the pillar's left side, for instance). In addition, it'll also respawn opposite its starting position if you scroll the pillar far enough off-screen without leaving the room, allowing you to corral some extra cash (they always drop a single gold coin and a red money bag, respectively). This candelabra directly below it, on the room's bottom level, shifts all the same.
This odd phenomenon repeats itself later on in Olrox's Quarters--in the horizontal room that contains a Blade and a Hammer Knight; the positions of the candelabras change depending upon your point of entry. (Contributed by Danny.)
 |
 |
Shaken to the Bone: Those pesky Skelerangs may look calm and collected as they lean against the wall and hop to, boomerangs in hand, at the very presence of a hero, but inside the ribcage of any such foe is the empty space that once housed the heart of a kitty. Take advantage of the Skelerangs' cowardly nature not by wasting long-range weapons to counter their annoying 'rang attacks but by getting up close and personal, in response to which Skelerangs will crouch down and cower in the corner, open to attack without retaliation.

A Boneheaded Decision: Alucard's buddies, the aiding Familiars, stick with their master through and through. However, the ol' crossbreed will have to give a pass to his literally brainless companion, the Ghost Familiar, which will abandon Alucard, in confused fashion, whenever he transforms into a bat. While the reason for its departing isn't fully understood, the Ghost Familiar will indeed return to Alucard's side when he retakes human form. (Contributed by Danny.)
Shattered Soldier: The Dracula X titles (as played on the PC Engine and SNES, respectively) had a brand of Axe Knight whose shields could be knocked away with a certain amount of force. While many of Symphony's enemy characters were recycled from earlier titles, its version of the Axe Knight was not--the fighting style derivative but the look and technique unique. However, as a nod to the older Dracula X assortment, the enemy designers threw in an easy-to-miss detail: An Axe Knight's shield can be destroyed, ripped from its hand, if Alucard strikes it with a sharp enough or strong enough blade. (Contributed by Danny.)
Cardiology Test: The most observable attribute of any save room is the large pulsating mass located at its center. "Well, that's just a random detail," you'd think. In actuality, the mass is a visual heart-rate monitor of sorts. That is, the rate of its pulsation indicates Alucard's current level of health; the lower his health-total--the more dire his prognosis--the faster it beats! Who knew? (Besides Danny, the contributor?)
Crescent Connection: Symphony is rife with references to other popular entertainment properties. One such example is the Moon Rod, whose physical form is reminiscent of the Moon Stick from the Sailor Moon manga series. Similar "lunar markings" include a crescent-shaped blade and a silver channeling crystal. (Contributed by Danny.)

 Malpractice
Makes Imperfect: This was sent in by
Lifeless312: When Alucard gathers certain items, like life- and heart-ups,
there's a short pause to follow while the tallies are raised. It's this
pause that interests us. If you change Alucard's shape at the precise
point in which you collect one of these upgrades, you can bring about some
unfortunate (for Alucard) glitches. There are two in particular:
Malpractice
Makes Imperfect: This was sent in by
Lifeless312: When Alucard gathers certain items, like life- and heart-ups,
there's a short pause to follow while the tallies are raised. It's this
pause that interests us. If you change Alucard's shape at the precise
point in which you collect one of these upgrades, you can bring about some
unfortunate (for Alucard) glitches. There are two in particular:
- Normal: If you remain in human form and transform into a bat as you collect one such item, you'll remain in human form but adopt the bat properties. In effect, Alucard will hover through the air in a crouching position and rotate accordingly. On a descent, he'll stand in an upright position, which makes it appear as if he's standing on air.
- Wolf to Bat: If you collect such an item while in wolf form and change to a bat at the point of pickup, Alucard will instead transform into a pair of floating yellow wolf legs. If you have the Fire of Bat relic, there will be another odd occurrence if you spit out a fireball--for a short period, a deformed red wolf will appear and before fading accompany the yellow legs.
 |
 |
|
As a man-bat,
Alucard flies in a crouch
|
Why not? His father
can do this
|
 |
 |
|
The wolf-bat becomes
a pair of Samus Aran legs...
|
...which then
become the dog from The Fly II.
|
Cheating Death: This secret is sent in by ray_e1x3@lycos.com: To start, you must begin a new mission by entering the "Luck Increase" code seen as seen on the code page. Make your way to the third room of the main hall--the room with three Wargs, right before the meeting with Death. After destroying the Wargs, unequip everything but the Alucard Sword, Necklace of J and the Twilight Cloak. Exit this room from the left and reenter. Kill the first warg and jump over the second (if you get hit, stop and use a pot roast since you're low on energy); after jumping the second warg, stand there and let it lunge into you--you'll be knocked two rooms over, past Death before it can stop you. You can now freely move on with your strongest weapons. If you return to the room where Death lurks before entering and exiting the Alchemy Lab, it will be there to steal away your weapons. As noted by Amar Youkai: This will not work in the Saturn version, as Alucard will simply land at the opposite doorway.
 |
|
The Saturn version:
A "glitch" unlike the glitch?
|
Richter Overkill: This glitch/secret is sent in by djac15@hotmail.com: First, when you reach Richter correctly--after receiving the glasses from Maria--you must destroy the Belmont and the floating green orb at the exact same time using a bomb (the sender suggests the pentagram); to do this, calculate the amount of hits it takes to destroy each of them and use the bomb when you come within one shot of what will destroy both. Afterwards, when you enter into the reverse castle, immediately go back to the regular castle's keep, down the stairs and one screen over. Now return to where you fought Richter, and he'll be there again! Fight the vampire hunter in a rematch, and use a library card if you get stuck in the battle area when the fight is over.
Unlawful Entry: This was sent in by Amar Youkai, and it applies to both Alucard and Richter: If you use the cross sub-weapon (normally for Alucard or as an item-crash for Richter) near the first gear-locked door in the Clock Tower (for reference the same location where you found Annet in Chi no Rondo), on either side, the move's very animation will see you become wedged in the ground, unable to get back to the platforms above. A resetting of the game will be in order. Note that this will also work for the same door in the Reverse Clock Tower.
 |
 |
Animation Manipulation: This glitch was sent in by ray_e1x3@lycos.com. First, work your way to an area where there's a switch that had to be hit in order to access another area (like the the one found in the Colosseum that lowers the gate dividing it from the Royal Chapel). Now, stand on the switch and equip the Wolf Bane or the Rapier. While standing on the switch, hit, in one motion, down, down-right, right plus attack; you'll notice that the animation of the respective special attacks will change in strange ways.
Exit Stage Left: This glitch, also provided by Amar Youkai, is simple to execute. Upon starting Richter Belmont's mission, you'll find the hero placed right in front of the rapidly closing gate. If you quickly turn left and perform a series of slide kicks, you can exit through the gate before it slams shut. Once outside, you'll find yourself in the woodland as seen in Alucard's intro; you can run across its entire length and to the end, doing which will trigger an inexplicable intro of Richter running through the woods and jumping across the again-closing drawbridge (as seen in the Saturn version). He won't be able to enter through the permanently closed gate, however, and will be stuck in the outskirts of the starting point. Alternately, if you walk out the gate rather than sliding, you'll instead fall into the remains of the unfinished path to the Underground Garden.
 |
 |
 |
|
Milked to the Max: This glitch, courtesy of Amar Youkai, will serve Alucard well in the area of healing. If you've earned yourself the Faerie familiar, you have with you an ally who when present will heal negative ailments by reaching into your inventory, grabbing available potions, and automatically administering them when negative status is incurred. You can further milk this act of convenience with some quick moves: When the Faerie is about to automatically use a potion, quickly enter into the inventory and equip that very recovery item in either hand; in returning to gameplay, and before the numbers indicating the amount of healing appear, activate the potion. If done correctly, the item's effect will be maxed out to 255.
Diddler on the Roof: If your thirst for breaching the walls, floors and ceilings of Castlevania hasn't yet been quenched, then let Alucard show you a new way to party. Head to the Royal Chapel, climb the perilously long staircase, and continue on; before entering the room guarded by a lone Spectral Sword, activate the Sword Brothers spell twice. If done correctly, you will after entering the Spectral Sword room be able to jump through the ceiling and up onto the roof. (Contributed by Amar Youkai.)
Twice Scorned: You say the Succubus shouldn't get off so easy for her crimes of manipulation? Make her pay again and again by using this glitch, which will reinitiate the battle between the half-breeds. Start by heading to the Underground Cavern room sandwiched between the real save point and the one that warps you to the dreamworld town. After equipping two heart refreshes and the duplicator, jump into the door on the right and begin using the heart refreshes, one after another, by alternating between one attack button and the other. Alucard will slowly but surely sink into the ground; when he's almost fully embedded, it's safe to pass into the next room, whose underpinnings will now contain Alucard. From this point, turn into a bat and fly right; you'll arrive in the dreamworld town, able to again fight the Succubus. (Contributed by Amar Youkai.)
Don't Cross Alucard: Alucard for whatever reason is incapable of using the cross sub-weapon in a tradition manner (tossing it as a boomerang) and instead calls upon its item-crash propensity. Spoil his fun by transforming into a bat, wolf or mist cloud during the part of the crash sequence where the white pillar of light begins to generate; doing so will cause the spinning crucifixes to cease well before the allotted time. (Contributed by Amar Youkai.)
Makin' Drac Wait: The Dark Lord waited 100 years (well, probably not) for a rematch with a Belmont hero. Make him sweat it by using Richter's midair dash to cross over into the throne room, whence the dialogue is supposed to begin, and then zip out before anything can happen. When you finally land, the screen will start to shift over for said dialogue sequence, yet you can continue to thwart it by running away, in effect continuing to screw around with the game mechanic. When you're done stalling, position yourself anywhere in the throne room to continue on as normal (with possible sprite-flickering). (Contributed by Amar Youkai.)
The Healing Power of Knowledge: A trip to the library can be good for the brain, yes, but apparently it can be good for your health, too. This is especially true for Alucard, who can find an additional benefit to using a Library Card: If at the time he's afflicted with any negative status (poison, cursed, etc.), his condition will be instantly cured via his teleportation back to the library. (Contributed by Danny.)
Echoes of the Recent Past: This audio glitch can only be activated in Castlevania: The Dracula X Chronicles version of Symphony. To start, you'll want to find an area where there's an additional layer of environmental noise beyond the music, like, say, the Outer Wall with its occasional downpour or the Clock Tower with its constant gear-mashing. When in any such area, use a Library Card to zip back to the Long Library; this should result in a situation where the environmental noise carries over to the Library and continues to function as accompaniment no matter where you go from there! It won't stop until you reset the game. (Contributed by Danny.)
Heart Swap: Traveling directly west of the Underground Cavern's upper entrance will bring you to a room with a heart container on a pedestal. Let's say, for whatever reason, you decide not to pick it up and continue traveling southwest, down into the cavern's watery depths. If that is indeed your inclination, you'll eventually arrive at a pool of water in the far-left corner of the Ferryman's room, where you'll find a Killer Fish guarding another heart container. If you collect this power-up and then return to the pedestal room, the other heart container will no longer be there! It's one-half of an odd vice-versa effect: Collect the pedestal-held heart container first and instead the one in the Ferryman room won't be there. Why it was programmed this way? No one knows. (Contributed by Danny.)
 |
 |
Guarded Entry: From the "Stuff You Probably Didn't Notice" files: The "Select Your Destiny" menu's background shows a rather detailed engraving of a demon. It turns out that we're looking at a zoomed-in view of the Alucard Shield. (Contributed by Danny.)

Early Credits: More than two decades after the Saturn version's release, user Bo (Low Context Burning Ranger) discovers one of the game's long-kept secrets: a code that allows you to gain quick access to the staff roll! On the Name Entry screen, enter "STAFF" as your name and you can cut right to the credits.
 |
 |
Back to the PlayStation Version | Back to the Saturn Version