Castlevania: Legacy of Darkness is centered around the quest of Cornell, who he traverses through almost all of the areas from Castlevania 64. His quest will be covered on this page. To learn about Reinhardt and Carrie's complete missions (including stage themes and minor enemies), please check Castlevania 64's stage layout. While some of the stages in Legacy are newly designed, their objectives remain largely the same. If on a given stage Reinhardt and Carrie's bosses differ from Cornell's, theirs will be listed accordingly. In Henry's mission, he can freely travel through six of these areas to save children: Forest of Silence, Castle Wall, The Villa, Underground Mine, Underground Tunnel and the Outer Wall, and he can potentially battle the bosses from the latter three areas. The extra areas that Carrie, Reinhardt or Henry can travel through will be listed at the bottom of this page, separate from Cornell's mission data.
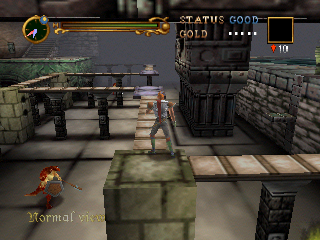
Stage 1: Haunted Ship


This forest proves to be not-so-silent when, early on, lightning immediately begins knocking trees down. When you locate a deceased villager, the dead will begin coming alive. You'll soon face a short trial against the stage's giant boss before it flees. The objective here is to run past and fend off the never-ending stream of skeletons, exploding skeletons and were-beasts to find switches that open up gates spread throughout the land. Your platform-jumping and cliff-hanging skills will be put to the test here. When you get through the final gate, you'll have to once again deal with boss and, this time, its motorcycle-riding friends before you can gain access to the castle.


Music Track(s)

Stage Track: Foggy Lake
Second Track: The Ocean
Boss Track: Water Dragon

Boss(es)

End Boss: Water Dragon

Lesser Enemies

Fishman | Ghost | Skeleton

Stage 2: Forest of Silence


This forest proves to be not-so-silent when the boss emerges early on for a little test battle before diving into the sea and swimming away. The object afterwards is to run past the never-ending stream of skeletons, exploding skeletons, goblins and werewolves to find switches spread throughout the land that open up gates and make platforms rise. When you've found all of the right combinations, after enduring many daring platform jumps, you'll find the boss again, and he'll be angry from his earlier whipping. After its defeat, a drawbridge will then drop, inviting you into the ancient Castlevania.


Music Track(s)

Stage Track: Forest of Silence
Mid-Boss Track: Shudder
First Ape Skeleton Battle: Skeleton Ape
Second Ape Skeleton Battle: Shudder

Boss(es)

Mid-Boss: (1) Giant Ape Skeleton, (2) Were-Tiger, (3) Were-Cougar
End Boss:
Giant Ape Skeleton

Lesser Enemies

Goblin | Skeleton | Exploding Skeleton | Bone-Throwing Skeleton | Bat | Fishman | Zombie | Werewolf | Were-Tiger

Stage 3: Castle Wall


When you enter the castle, two gate doors are blocking the way; Ortega will appear to taunt you from inside. You'll have to enter the right tower, at a certain time of day, to go upward, drop down to the stage's second level, and find a winch lever that you can then use in the left tower's lever-less switch to open the main gate. But it's not that easy, as a boss that guards that activation gears will try to prevent you from plugging in the winch lever. Defeat the boss, activate the switches in both towers, and you're on your way. If you do this in the wrong order, one part of the caged door may go up while the other stays put; you may have to climb the individual towers again to get it right.


Music Track(s)

Stage Track: The Watchtower
Boss Track: Bone Dragon

Boss(es)

End Boss: Guardian Skeledragons

Lesser Enemies

Bone Pillar | Medusa Head | Skeleton | Exploding Skeleton

Stage 4: The Villa


Outside, a series of Cerebroses block the Villa gate, each set stronger than the last. A ghost-inhabited courtyard follows. Entering the mansion, you'll face a minor vampire and then fight a vampirized Master Oldrey; defeat him, talk to Mary, and collect a series of keys (see here) to reach the maze. In the maze, you'll find Henry. To save Henry, you'll have to lead him out of the garden maze, avoiding a chainsaw-armed Frankenstein and some Cerebroses. After leading him out, Mary gives you a key that opens up a copper door within the garden maze. Go back to the courtyard, hit tombstone switches in the right order, and get Crest B atop the fountain using a rose brooch; Crest A is in the maze.


Music Track(s)

Stage Track: Silent Madness
Cerberus Battle: Cerberus I
Flame Cerberus Battle: Cerberus II
Hell Cerberus Battle: Cerberus III

Vampire/First Oldrey Battle: Shudder
Hedgemaze Track: Maze Garden
Boss Track: Second Struggle

Boss(es)

Mid-Bosses: Vampire , (2) Cerberus, (3) Flame Cerberus, (4) Hell Cerberus, (5) Vampire Oldrey
End Boss: Gilles De Rais
Reinhardt/Carrie Mid-Bosses: (1) Vampire Oldrey, (2) Vampire, (3)
Frankenstein Gardener (Hard Mode)
Reinhardt/Carrie End Bosses: (1) Vampire Oldrey, (2) Female Vampire

Lesser Enemies

Skeleton | Ghost | Skull Head | Stain-Glass Knight | Motorcycle Skeleton | Snake | Mudman | Hound | Bone Pillar | Frankenstein gardener

Stage 5: Outer Wall


This stage is actually the top of the tallest castle wall, where you'll have to climb across roof-like structures, moving platforms, narrow walkways and support arches. Most of the stage follows this pattern, with a few instances where you'll have to go inside the wall to find elevators that lead to higher foundations; these inside rooms require dodging giant Indiana Jones-like boulders and spinning bladed gears. Once high atop the castle, a roof-splitting gear trap will be your final challenge. All that'll be left is to glide down a series of sloping roofs without falling to your death. From here, an elevated lift will take you to the top of another castle tower for the battle with the boss.


Music Track(s)

Stage Track: Unseen Entry
Boss Track: First Stuggle

Boss(es)

End Boss: Harpy

Lesser Enemies

Skeleton

Stage 6: Tower of Art


To start, you'll need two keys to open two doors in the main hall. The keys are in similar corridors to the left and right, where many moon and sun cards will have to be utilized in combination. The challenges here are avoiding steam blasts while riding tracked platforms and running up rail tracks while dodging mine carts. When you get both keys, two vampires will attack you in the main area. In the next room, you'll battle some knights before climbing atop a gallery and walking a tightrope while avoiding swinging chandeliers. The final room has a narrow railway that you'll have to cross while eluding with a flaming mine cart; you'll have to negotiate the platforms lining the room to escape.


Music Track(s)

Stage Track: Sinking Old Sanctuary

Boss(es)

End Boss: None

Lesser Enemies

Knight | Phantom Weapons | Art Tower Vampire

Stage 7: Tower of Ruins


The quirk of this stage is that its early rooms all look the same. Using man-made maps etched into the ground, you'll have to find switches that raise the three gates that block your progress. You must creep around the sides of each room to avoid the collapsing floors and protruding spikes. In the next area, it's more switch-activating, as you'll have to find two such switches within a room featuring collapsing and moving platforms. Blind jumps will have to be made. Finally, you'll be challenged by a puzzle involving zodiac signs: You must jump to the correctly-labeled pillars that appear in each set of two--this in order to make another labeled pair rise up. Pick the wrong one, and it's over.


Music Track(s)

Stage Track: Thorny Grave

Boss(es)

End Boss: None

Lesser Enemies

Knight | Snake | Goblin | Zombie | Crawling Zombie

Stage 8: Tower of Science


Mostly, you'll ride conveyor belts around and around the tower center while trying to dodge laser blasts and machine-produced spiked boxes that will be spit out from the openings. Your reflexes and jumping ability will be tested here. Atop the tower, many turrets and mechanical cannons guard the area, hindering your goal of finding your way through doors labeled with Roman numerals. The last such door requires the control room key, which is in a large room heavily guarded by ceiling-installed laser turrets. More reflex and jumping action will lead you to it. After escaping the madness from the ventilation system, the source of the tower's power will have to be destroyed.


Music Track(s)

Stage Track: Specimen
Boss Track: Security Crystal

Boss(es)

End Boss: Security Crystal

Lesser Enemies

Goblin | Turret

Stage 9: Duel Tower


This chaotic and poison-water-filled stage has towers and sunken platforms laying all around. You'll have to jump around the corridors and narrow paths to make it to battle fields where you'll face four bosses--each one is tougher than the last. The jumps get more dangerous as you get further in, as rotating blades and crumbling platforms must be negotiated. When you reach the final battle area, a cage will lower, and Ortega will appear to taunt Cornell once more. The forces of evil have been hard at work creating the ultimate were-beast, and this will be the tower's final challenge. A deceptively difficult jump will be required to escape this area.


Music Track(s)

Stage Track: Encounters
Boss Track: Shudder

Boss(es)

End Bosses: (1) Were-Tiger, (2) Were-Cougar, (3) Were-Bull, (4) Warewolf
Reinhardt Bosses:
(1) Were-Tiger, (2) Were-Cougar, (3) Were-Bull, (4) Were-Leopard

Lesser Enemies

Fishman | Medusa Head

Stage 10: Tower of Execution


Like the stage before, regular and sunken platforms are scattered throughout the lava. Working your way around and up the narrow passages, you'll deal with swinging hatchets, quick-stabbing guillotines traps, crumbling caged floors, and some fishmen. Later on, steel grates are your only means of travel, but steam and lava-spawned flames rise through them, and they can lead to a quick demise. Also, there are traps where giant iron balls fall from the ceiling at timed intervals and hit the lava, splashing and splattering it everywhere; timing it perfectly, you must work around the circle-shaped grates before the next one falls. The final stretch of rooms is a combination of all the just-mentioned traps.


Music Track(s)

Stage Track: Deadly Ambition

Boss(es)

End Boss: None

Lesser Enemies

Bone Pillar | Medusa Head | Blood Skeleton | Phantom Weapons

Stage 11: Tower of Sorcery


This mystical area seems to be part of a chapel. Running along thin, icy platforms, you'll initially have to fend off some ice monsters. The whole stage is basically a series of difficult jumps onto the icy platforms, and these are made difficult by the electricity-spewing and laser-firing crystals that are stationed on platforms above--placed where timing is crucial, of course. So while it's important to pace yourself and remain calm, as to not slip and fall, you'll also have to know when to turn up the speed so that you don't get caught on a platform that's about to disappear. Because of the transparent nature of the ice, it's difficult to judge distances, and you may take a flying leap to your death.


Music Track(s)

Stage Track: Mystic Tower

Boss(es)

End Boss: None

Lesser Enemies

Ice Monster | Crystal Shard | Ghost

Stage 12: Room of Clocks

The Room of Clocks isn't so much a stage but rather a quick access point to the tower-top where the game's respective antagonists await a given hero--Ortega, in this case. On the way there, you'll pass through the circular clock room whose alcoves give shelter to eight grandfather clocks (and it a bears a strong resemblance to the fleaman-occupied clock rooms found in Symphony of the Night's Marble Gallery). This room represents your only chance to save your game and summon Renon. When you're ready, head right; there you'll find a lift that will carry you up to the tower-top and trigger the big encounter. Once Ortega has been defeated, you can head back down into the Room of Clocks and subsequently exit the stage.

Music Track(s)

Stage Track: None
Boss Track: First Stuggle

Boss(es)

End Boss: Ortega
Reinhardt Boss: Death
Carrie Boss: Actrise

Lesser Enemies

There are no minor enemies in the Room of Clocks.

Stage 13: Clock Tower


The Room of Clocks foreshadows what comes next: the classic clock tower. This variant of it is basically four large areas of moving gears and cogs, each containing locked doors. Of course, the keys to each door are hidden within the same rooms. In the latter area, you must manipulate the large hands of the clock by working around a steam room, across pendulums, and down a wooden slide to find the switch that activates it. Once the lever is pulled, the time of the clock will change to 3:45, creating a 180-degree angle; you can now go outside and walk across the hands to get to the castle keep.


Music Track(s)

Stage Track: Toothed Wheel

Boss(es)

End Boss: None

Lesser Enemies

Bone Pillar | Knight | Bat | Goblin | Medusa Head

Stage 14: Castle Keep


This stage is just a long stairway leading up, conjoined by two large rooms. In the first room, you'll run into Renon, who comes to take his leave. If you spent too much money, though, you'll have to fight him in his true form; otherwise, just move on after he's done talking about an impending global war. The second room holds no such confrontation (only reserved for Reinhardt and Carrie's missions). At the very top, the throne room, is the first of the final battles. Dracula will greet you and the battle will begin. After defeating him, you'll be transported to an isolated realm where you'll face Dracula's true form.


Music Track(s)

Stage Track: Stairway to the Clouds
Renon Battle: Second Struggle
Dracula's Servant Battle: Third Struggle
Ultimate Dracula Battle:
Fourth Struggle

Boss(es)

Potential Boss: Renon
End Boss: (1) Dracula, (2) Ultimate Dracula
Reinhardt/Carrie Potential Boss: (1) Renon, (2) Charlie Vincent
Reinhardt/Carrie Boss: (1) Dracula's
Servant
,
(2) Dracula, (3) Drago

Lesser Enemies

There are no minor enemies in the Castle Keep.

Other Areas

As mentioned at the top of this page: Once you clear the game with both Cornell and Henry and subsequently unlock Reinhardt and Carrie as playable characters, the game basically becomes Castlevania 64. However, the layout for most of their stages changes a bit, and bosses not seen in Castlevania 64 appear. And one stage is added onto their missions: The Haunted ship, which'll serve as the opening stage of their respective missions. Below are the areas that Cornell didn't traverse.

Underground Mine


This stage, 5A regularly, is only for Reinhardt. After passing some rock-crushing blades, you'll fight your way through bat-filled caves that entail many split paths, most of which contain platform-lined chasms. After jumping from platform to platform over some poisonous water, spider women will submerge and be a problem for the rest of the stage. When you reach red horizontal lift, ride it until it slows down; get on the platform and wait for the next lift to come along. More split paths will follow, and you may need to use some moon or sun cards to proceed through some of the doors, especially the one which holds the boss.


Music Track(s)

Stage Track: Invisible Sorrow
Boss Track:
Shudder

Boss(es)

End Boss: Spider Woman Queen and Unperched Queen

Lesser Enemies

Bat | Spider Woman | Medusa Head | Bone Pillar | Ghost | Skull Head

Underground Tunnel


This is for Carrie--her stage 5B. This underground waterway, filled with poisonous water, has many narrow paths that you'll have to run across while battling the poison-spewing lizard men. Jog along the first narrow passage and jump over a gap to hit a switch that stops the first waterfall. Go up some stairs and over a bridge, continuing along the path. When you come to an area with very narrow walkways, jump to the isolated platforms then jump over to the next switch. Backtrack a little bit and cross a now-accessible bridge; avoid falling spike traps and fishmen and hit this last switch. The door to the boss will be open.


Music Track(s)

Stage Track: Sinking Feeling
Lizard Men Battle:
Shudder
Boss Track:
Shudder

Boss(es)

Mid-Boss: Lizard Men
End Boss:
Medusa

Lesser Enemies

Lizard Man | Medusa Head | Bone Pillar

Castle Center


This multilevel area, stage 6 for both, has a subtask: Find magical nitro and mandragora and put them together to blow open two rickety walls. The catch is this: When carrying nitro, you can't jump or get hit even once, so carrying it from the top to the bottom floor is a task--a mutated Lizard Man, who resides on the top floor, will give you the key to the Mandragora room. The rickety wall on the top floor needs to be passed to get to the angel statues in the attic which hold the castle under a magical spell. After blowing up the bottom wall, you can open the way to the next stage, fighting two bosses first. Depending on the character you're using, the second boss will be different.


Music Track(s)

Stage Track: Dungeon
Demon Bull Battle: Fourth Struggle
Reinhardt End Boss: First Struggle
Carrie End Boss: Second Struggle

Boss(es)

Reinhardt Bosses: (1) Demon Bull, (2) Rosa
Carrie Bosses:
(1) Demon Bull, (2) Carrie's Cousin

Lesser Enemies

Motorcycle | Skeleton | Vampire | Bloodborn | Bat | Knight | Lizard Man | Cerebros | Bone Pillar | Stain-Glass Knight | Ghost | Medusa Head

Back to Stage Listing | Back to Game Page